Follow these instructions to remove or replace a Go Wireless® 250 mAh Replacement Battery (
To replace batteries on other Go Wireless devices, see
How do I remove or replace a Go Wireless Temp battery?
How do I remove or replace a Go Wireless pH or Go Wireless Electrode Amplifier battery?
Battery Removal Instructions
Tools needed: Phillips screwdriver (#00 or #2)
- If necessary, remove a connected sensor from the Go Wireless Link.
- Unscrew and remove the charging end cap on the Go Wireless Link.

- Unscrew the BTA connector end cap on the Go Wireless Link.
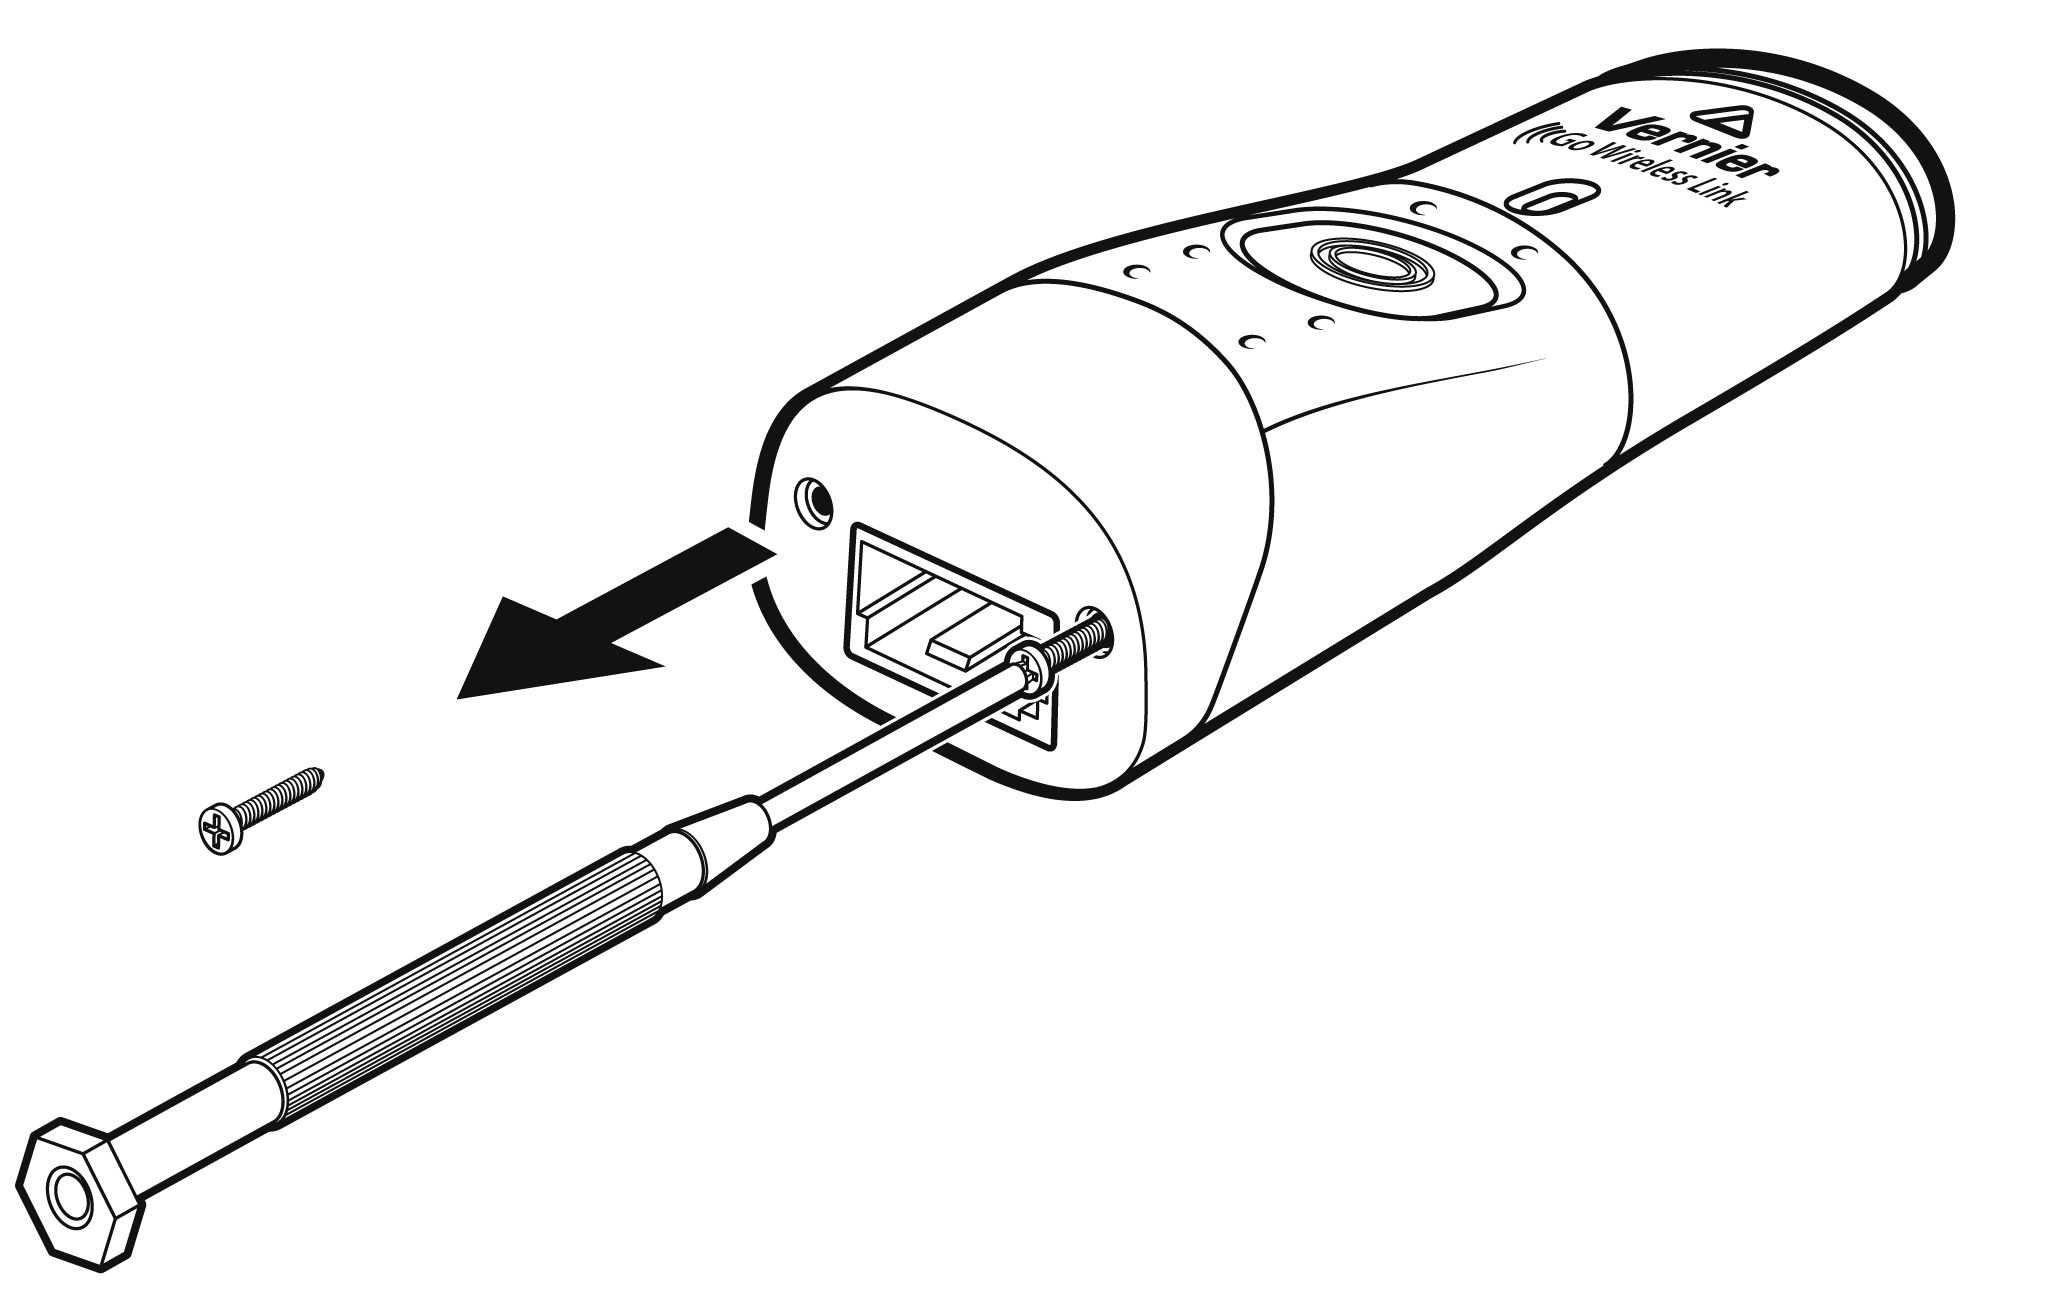
- Remove the BTA connector end cap.
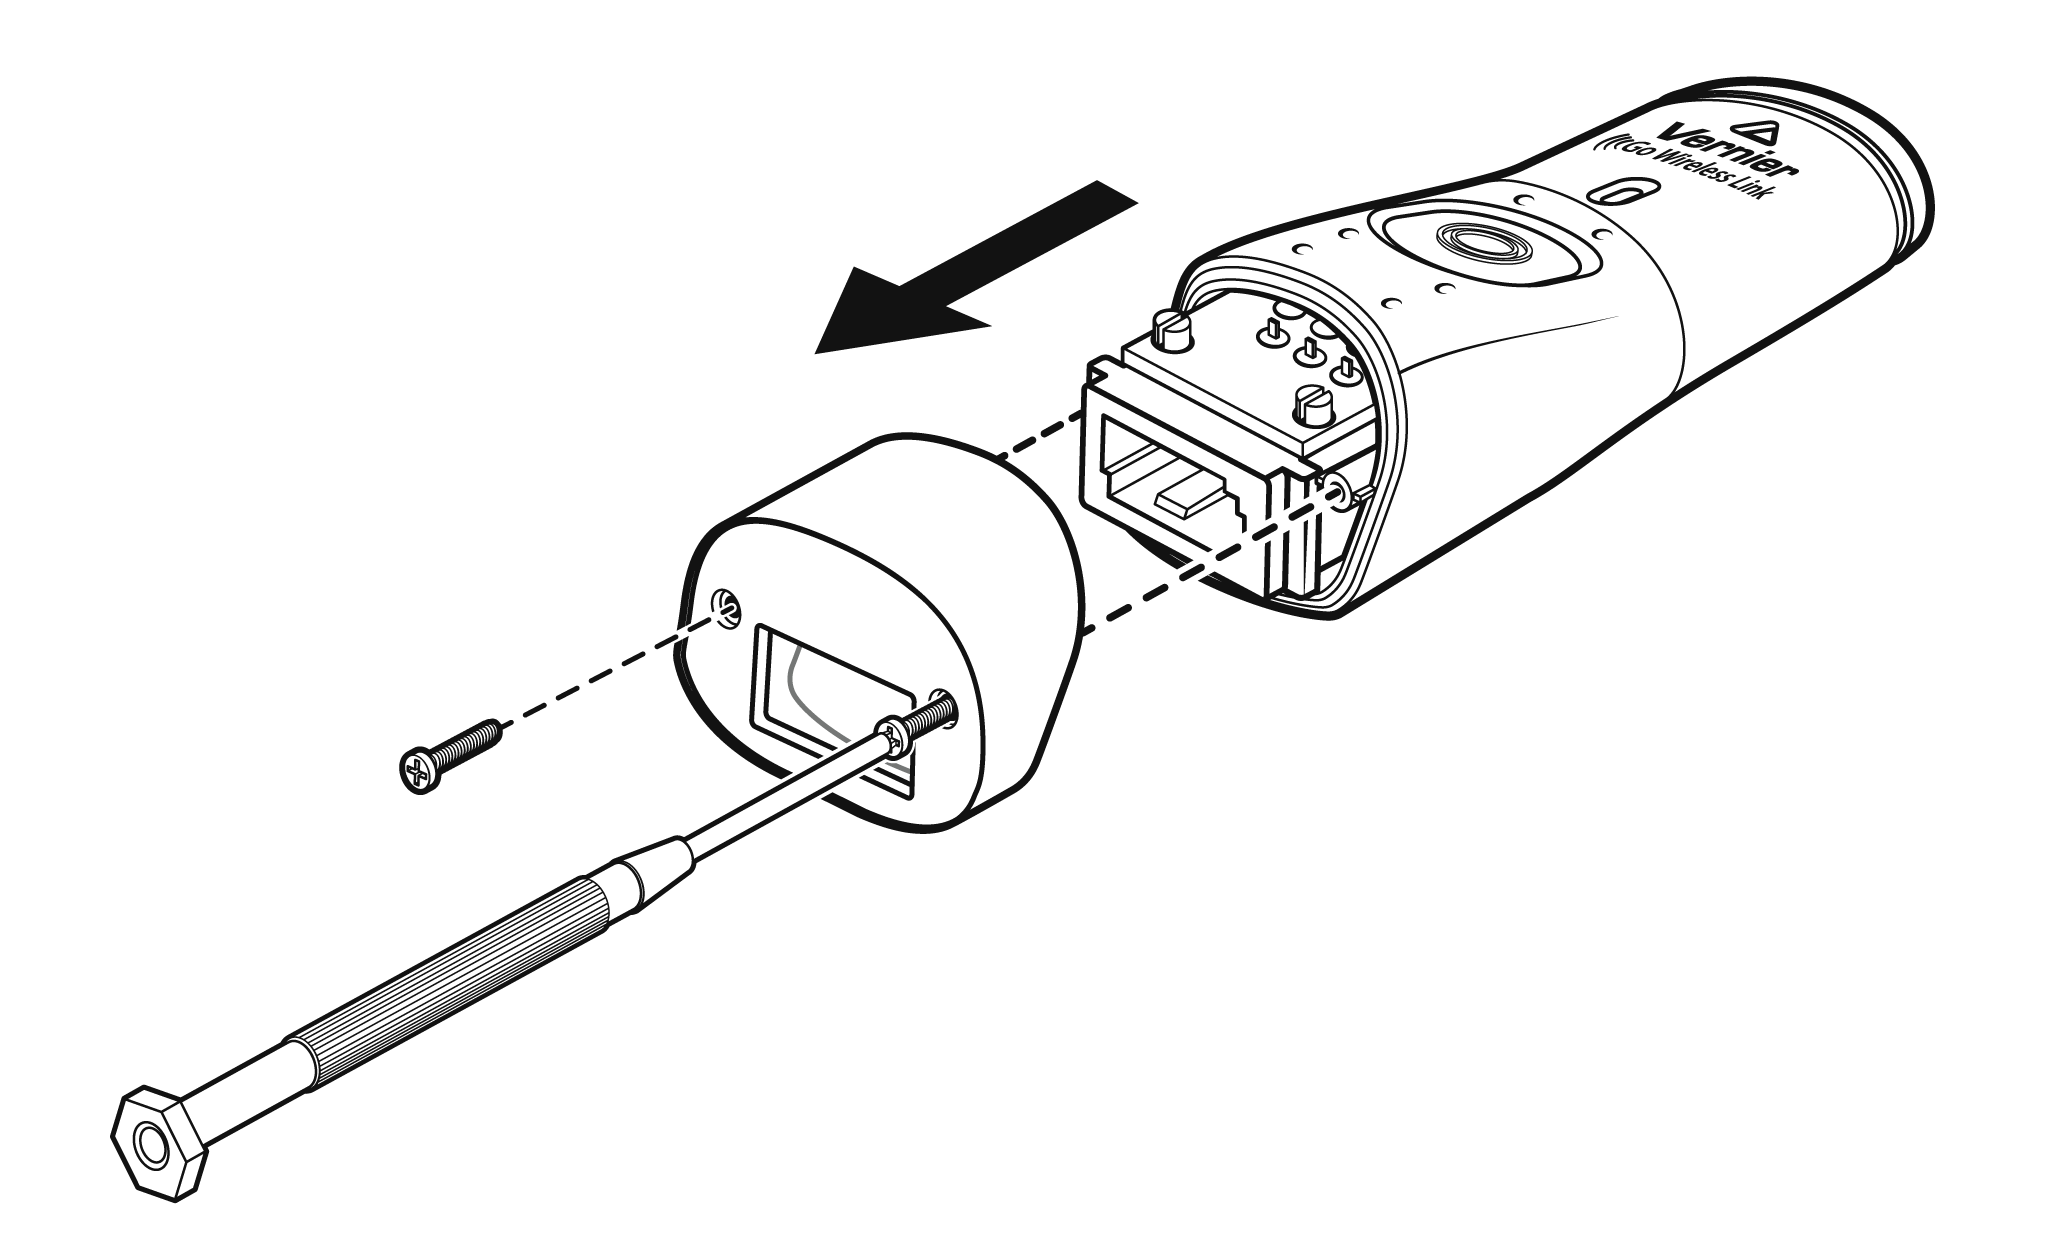
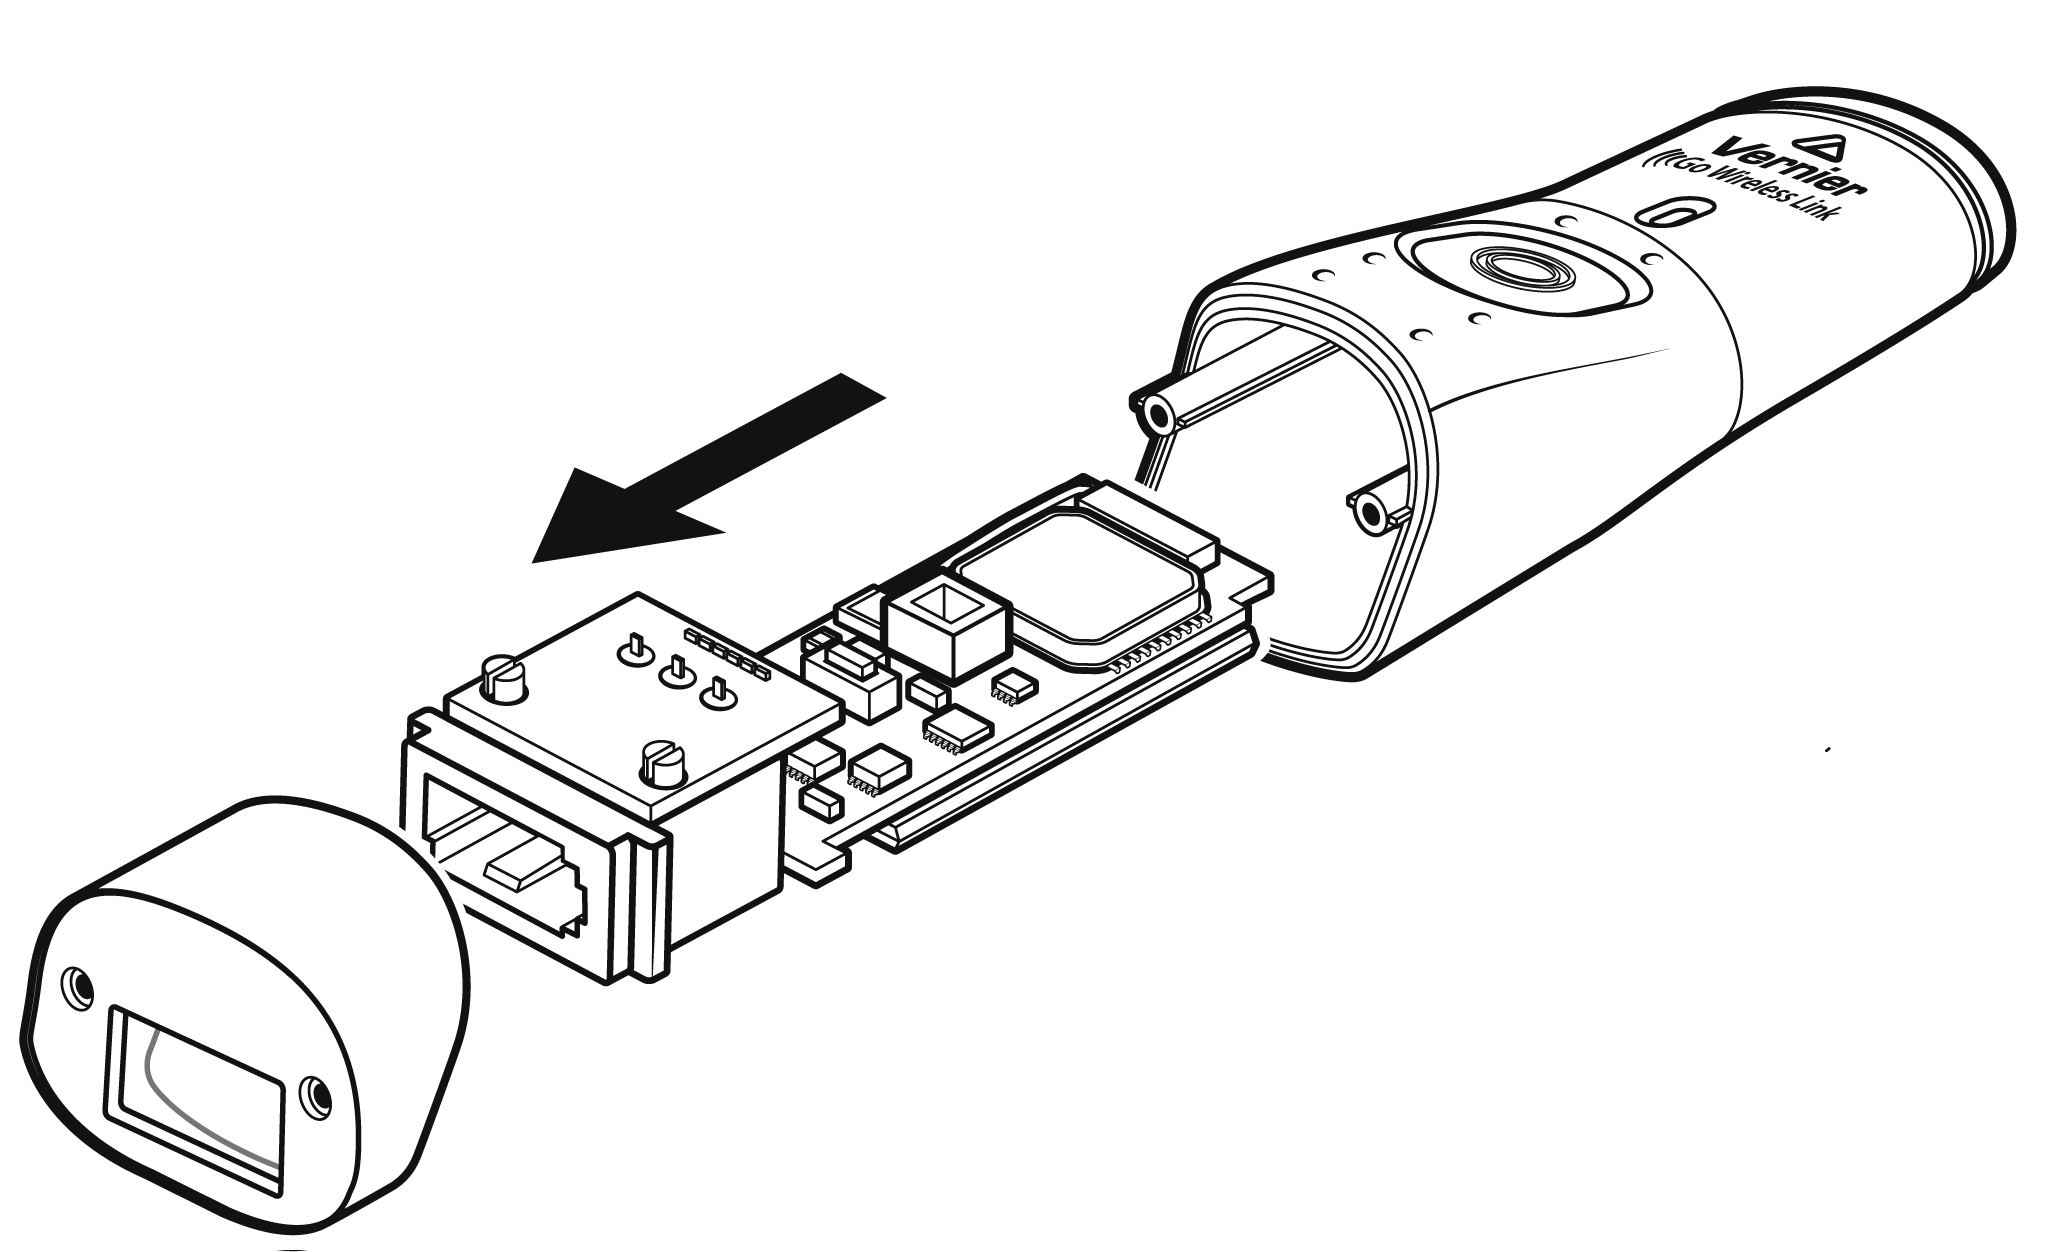
- Carefully slide the circuit board out of the housing.
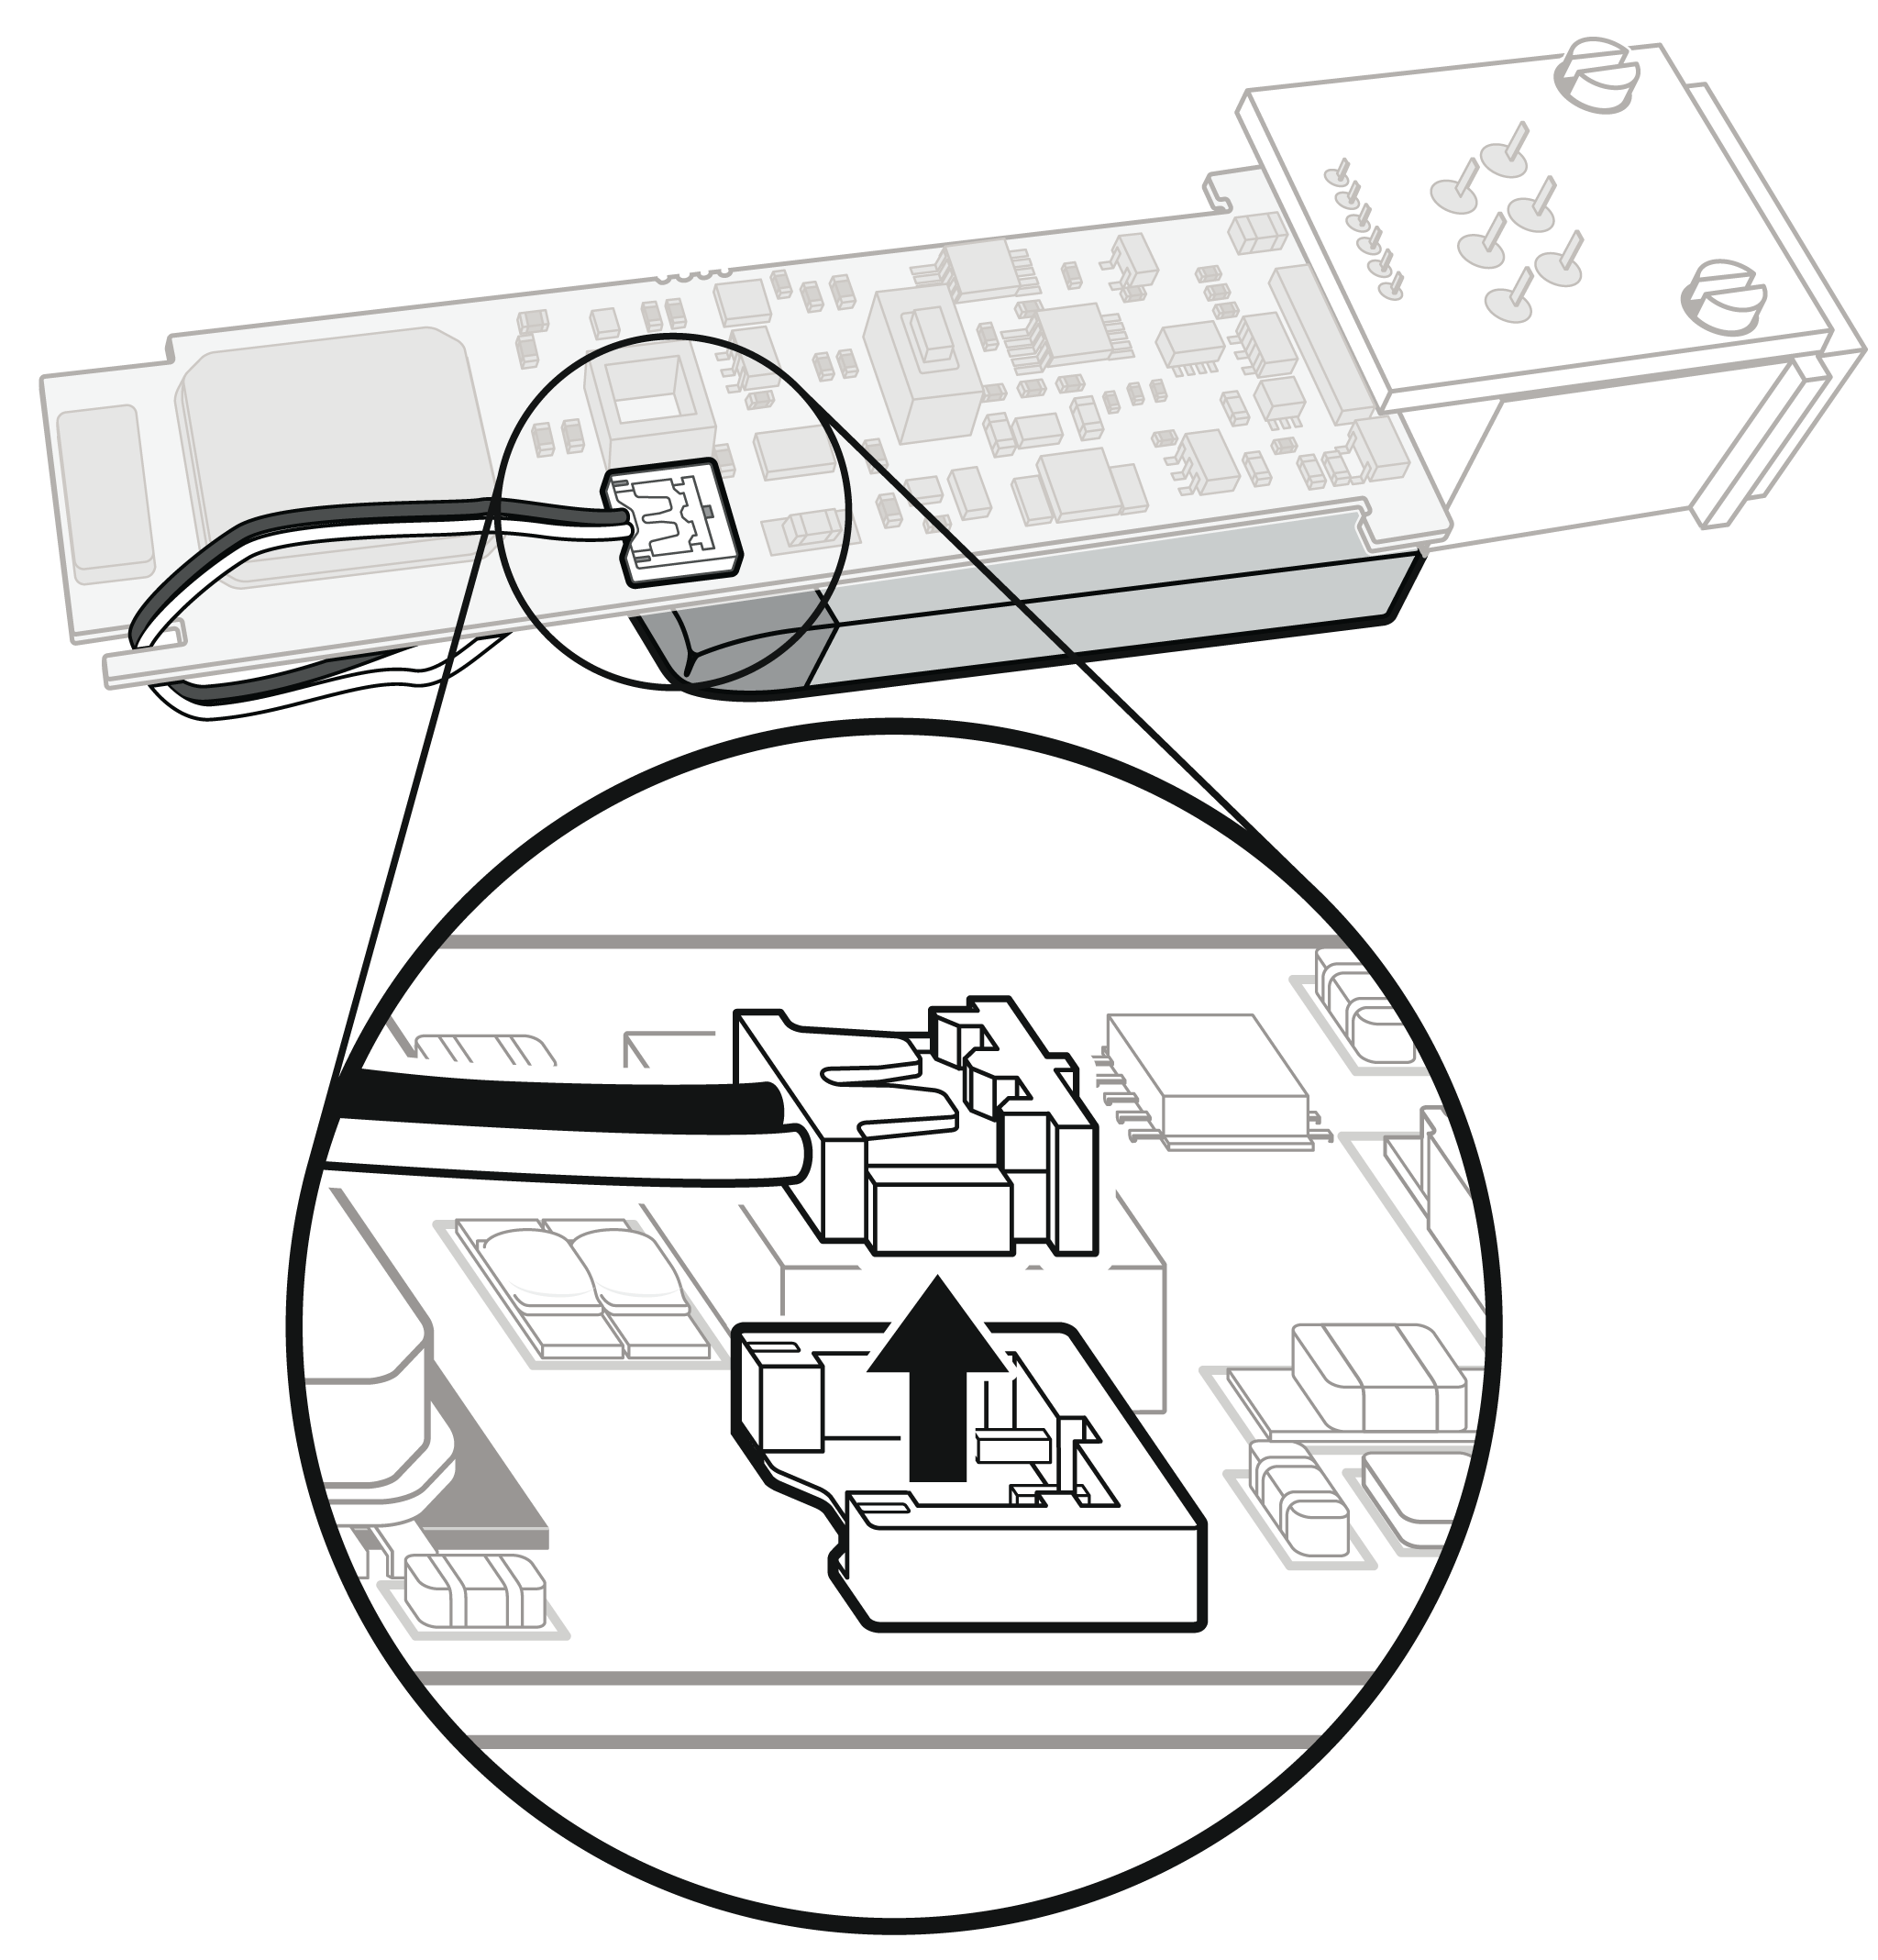
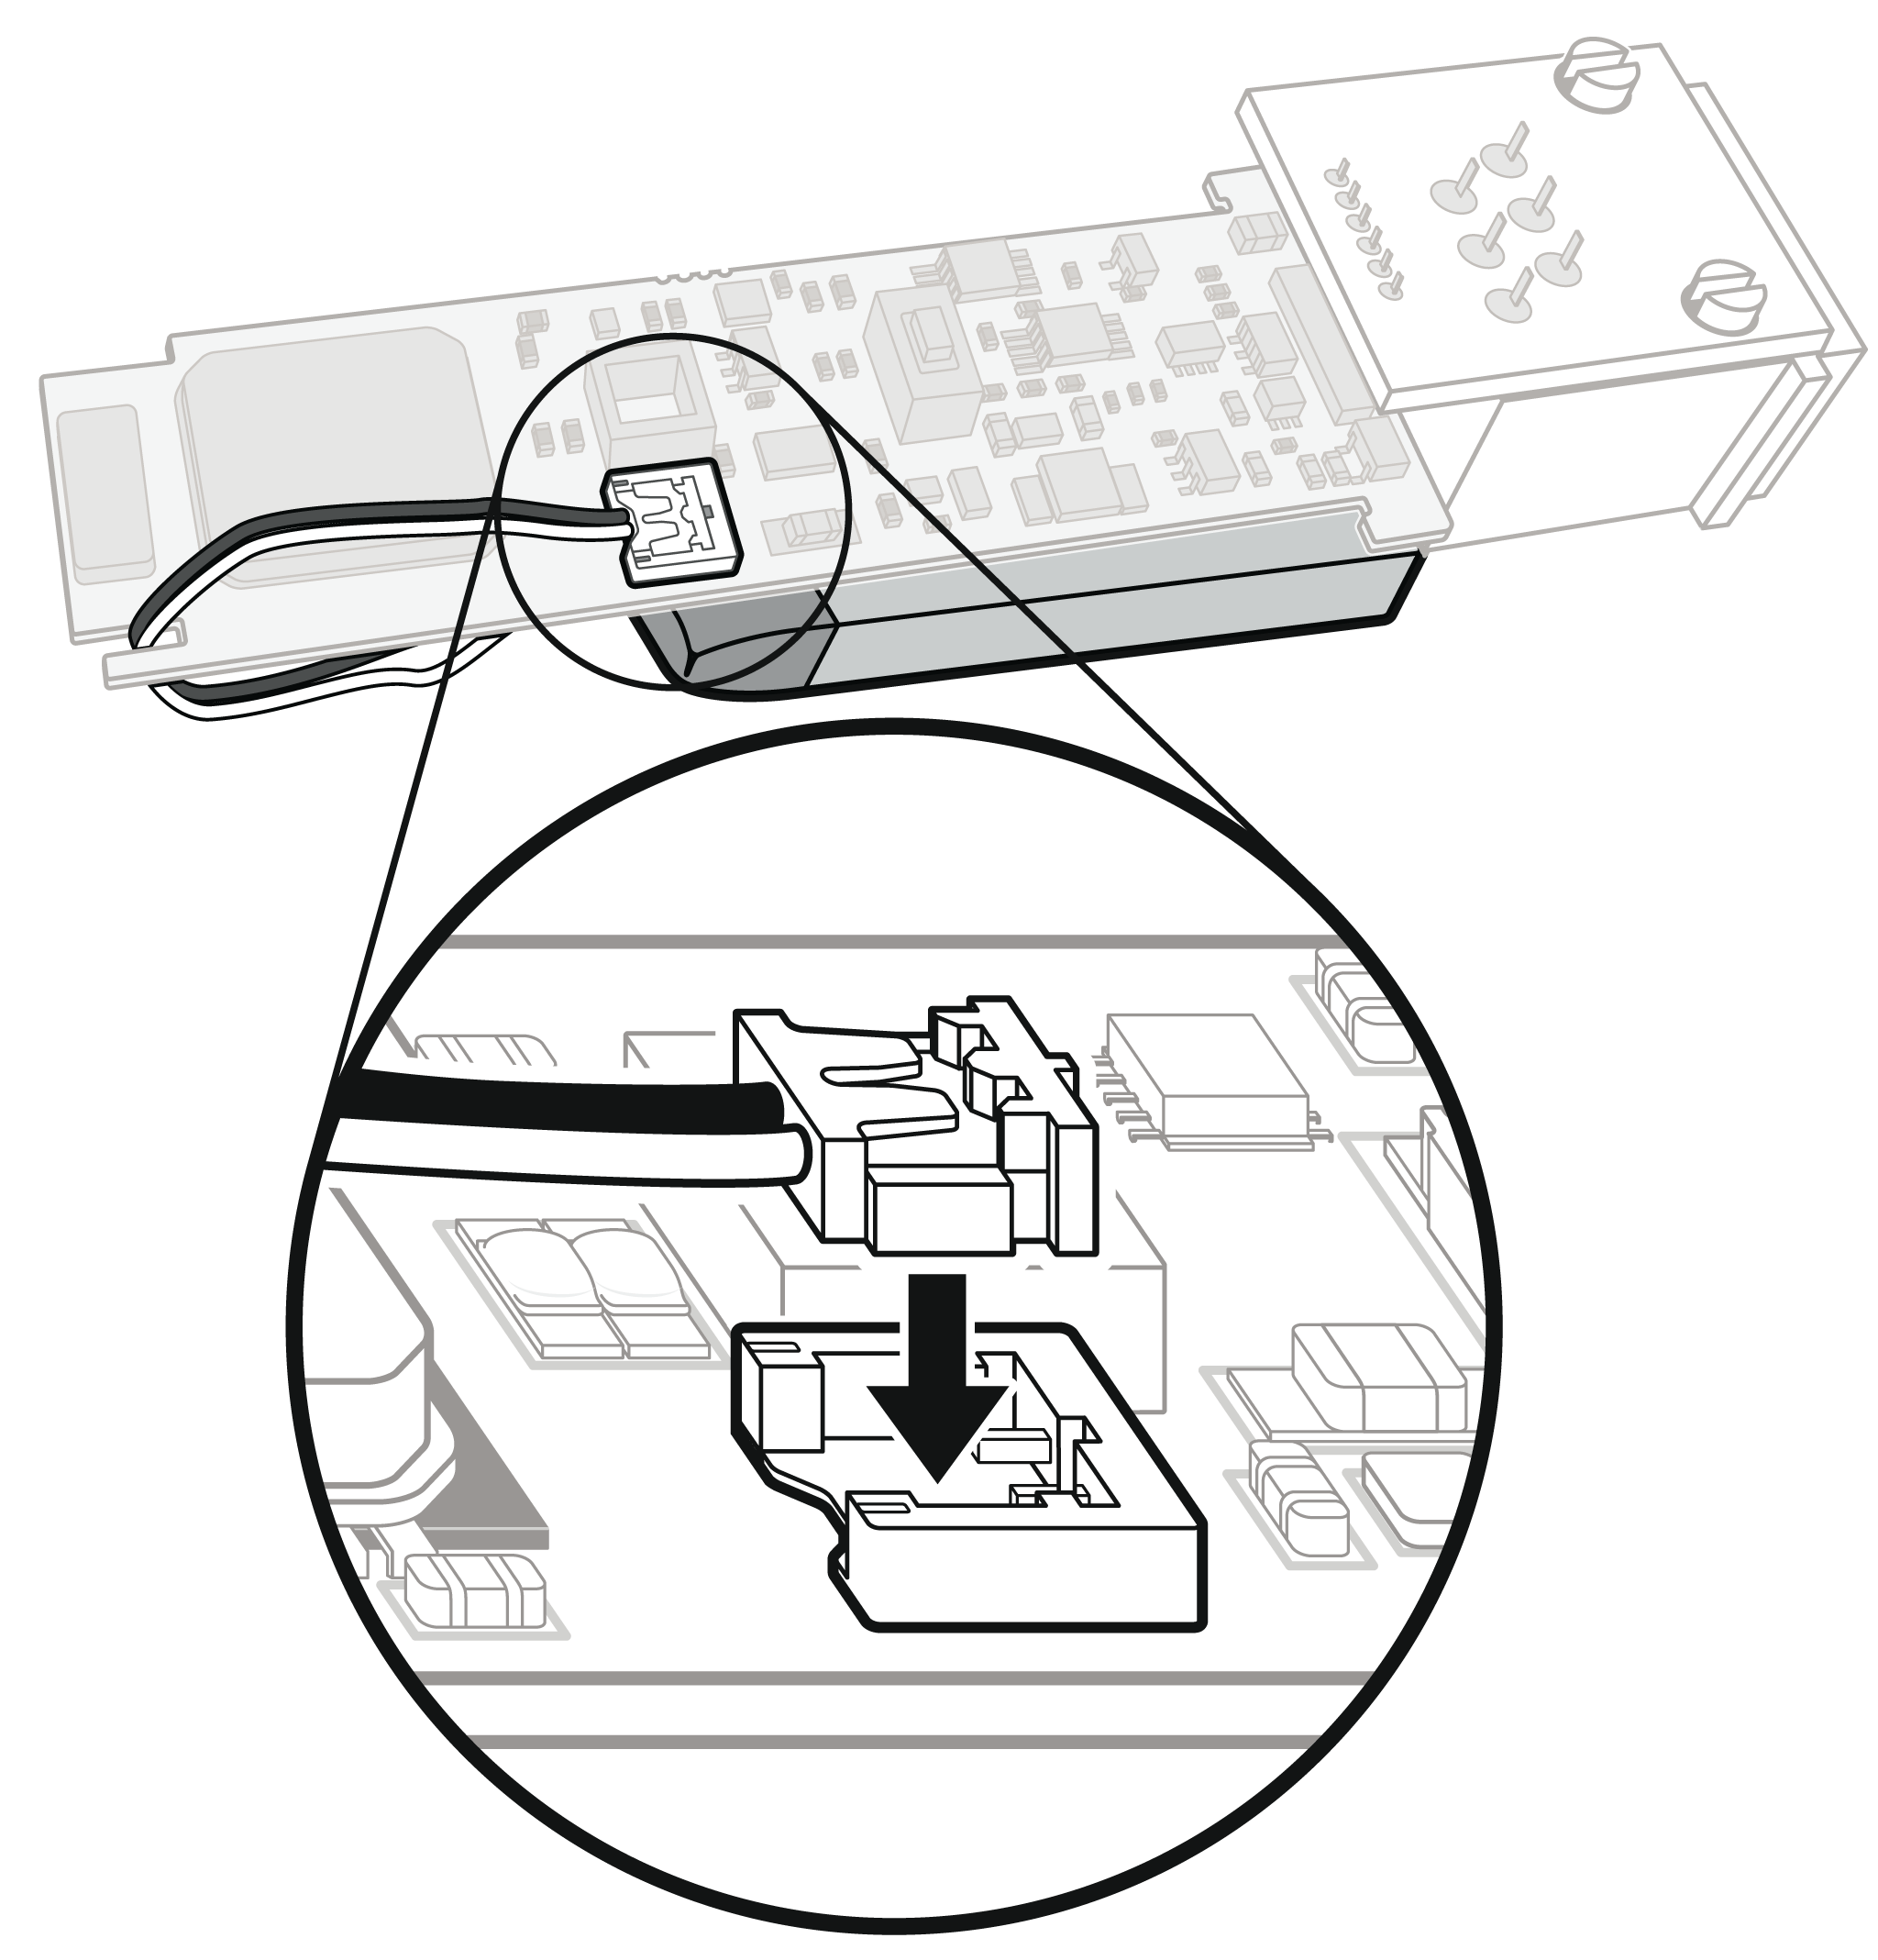
- Carefully pull up on the battery connector to remove it from the circuit board.
- Please be sure to dispose of the old battery properly. To find a recycling center near you, see www.call2recycle.org
Battery Replacement Instructions
- Follow the Battery Removal Instructions, above, to remove the dead battery.
- Press the new battery connector down onto the associated pin connector located on the circuit board. Wrap the wires around the edge of the circuit board as shown.
- Carefully slide the circuit board into the housing. Be sure the charging end cap has been removed before replacing the circuit board or permanent damage can result.
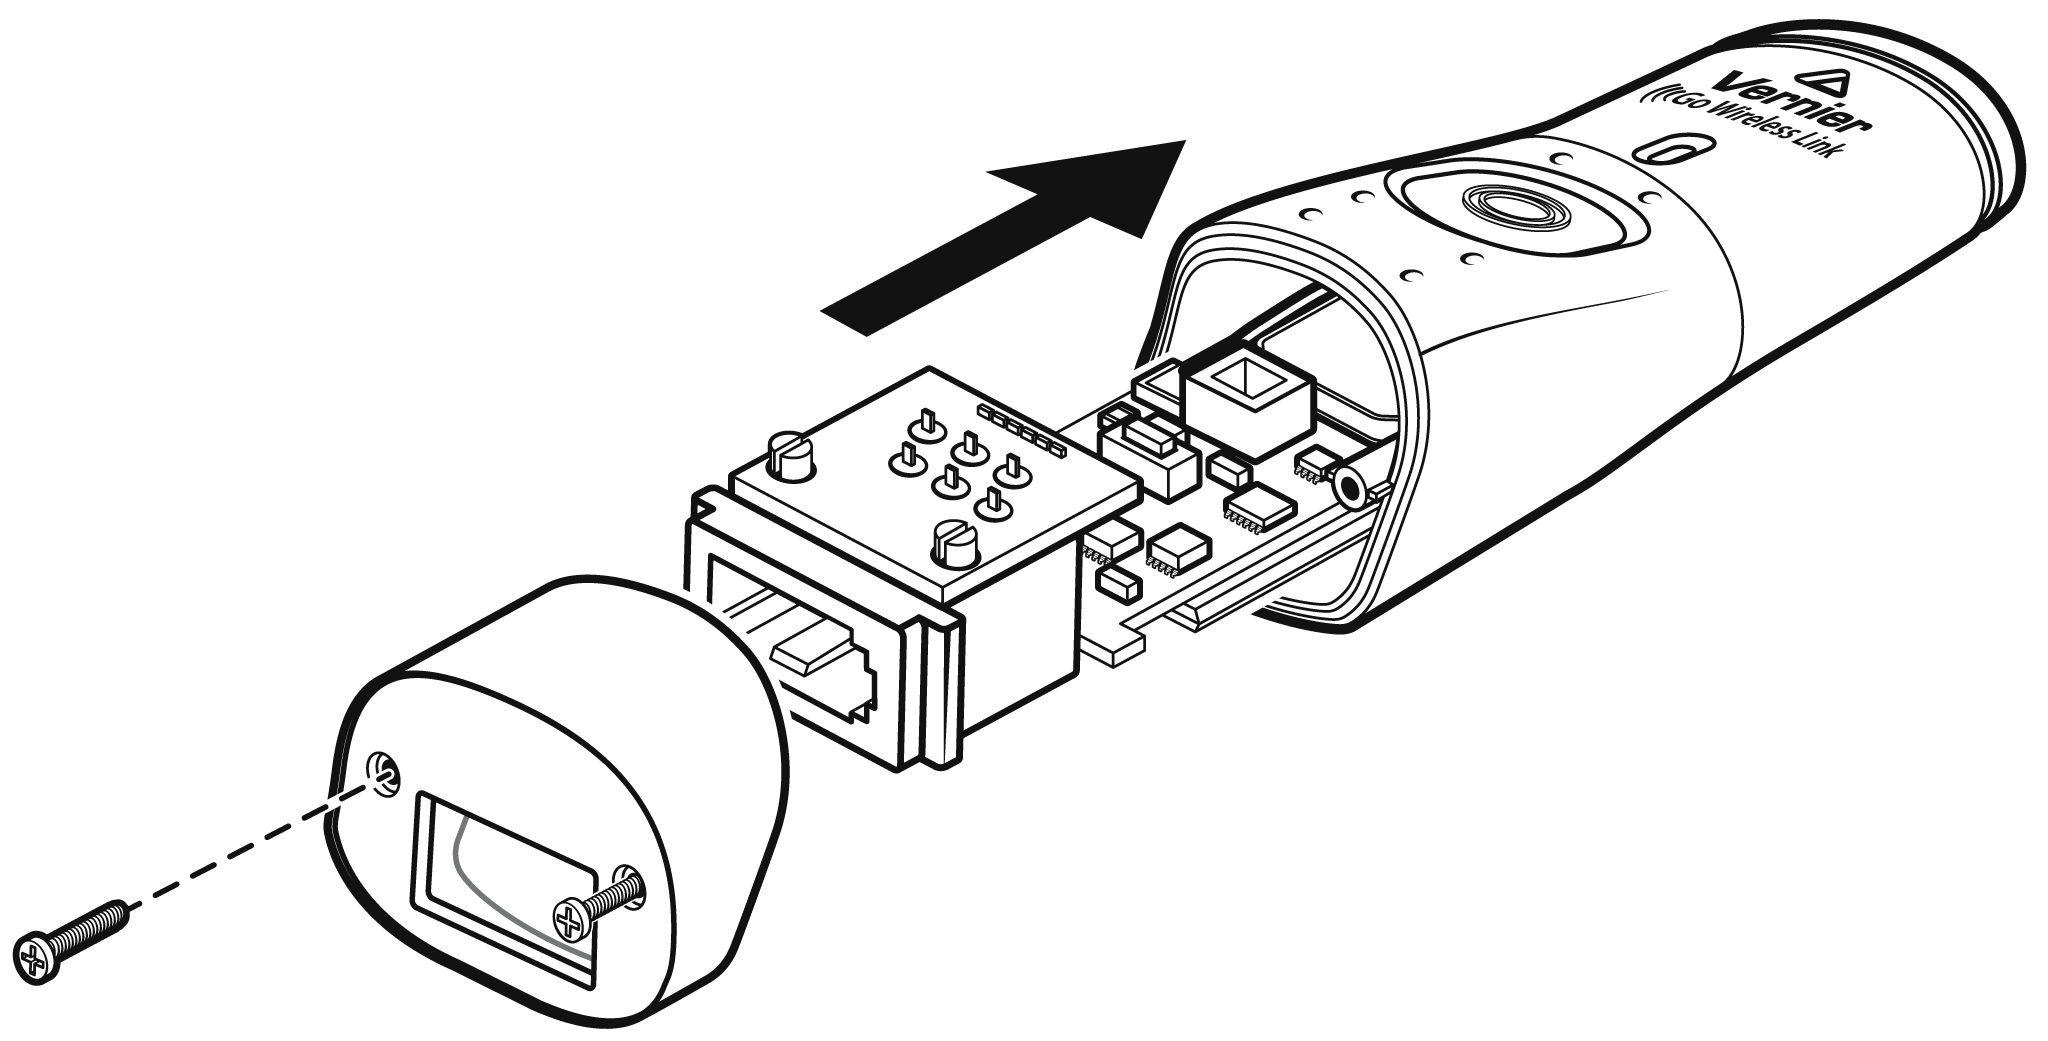
- Place the BTA connector end cap onto the housing.
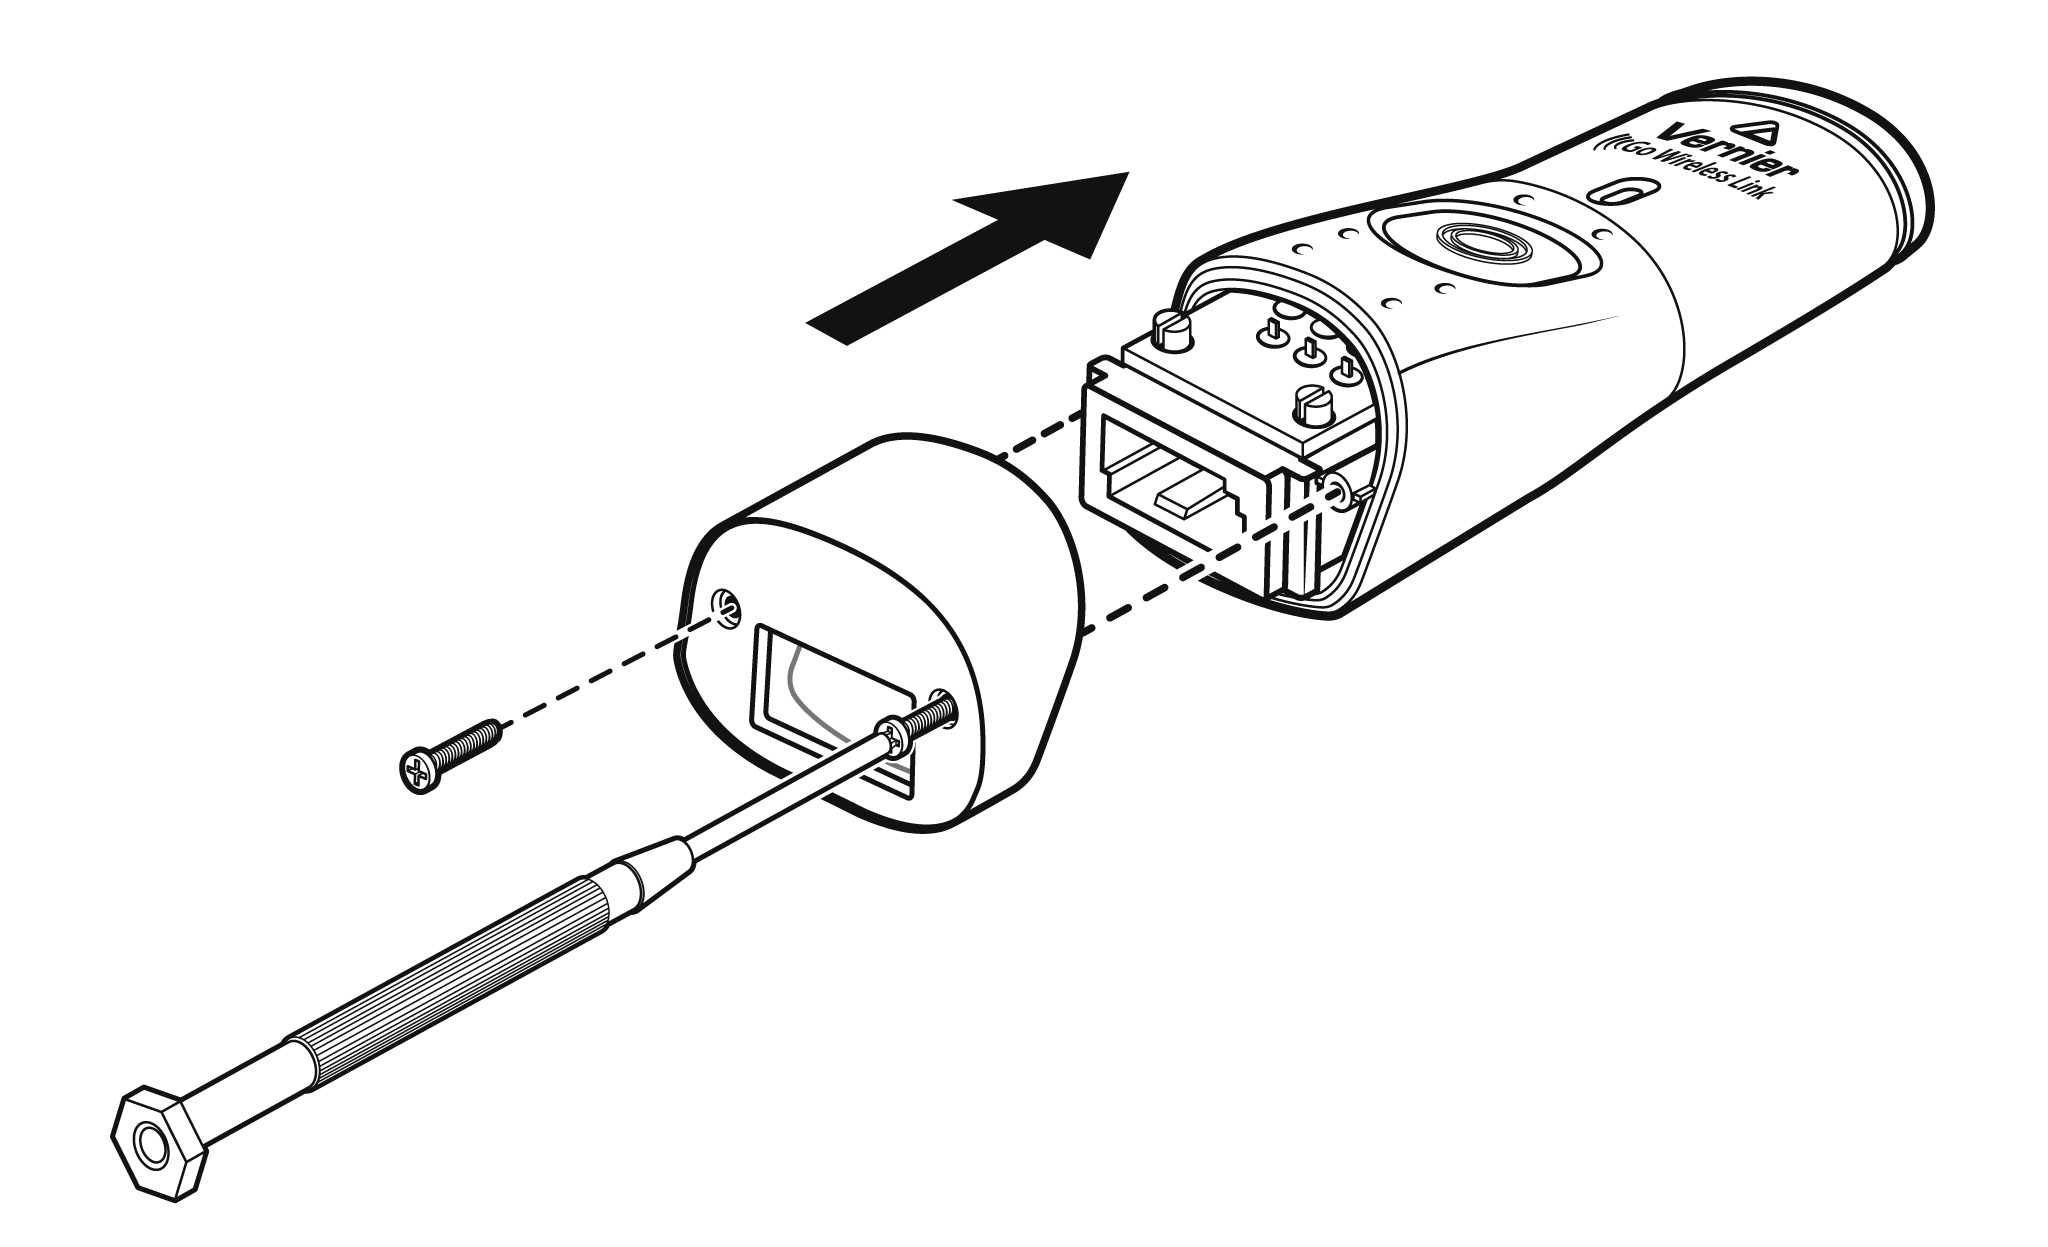
- With the BTA connector end cap in place, secure with two screws.
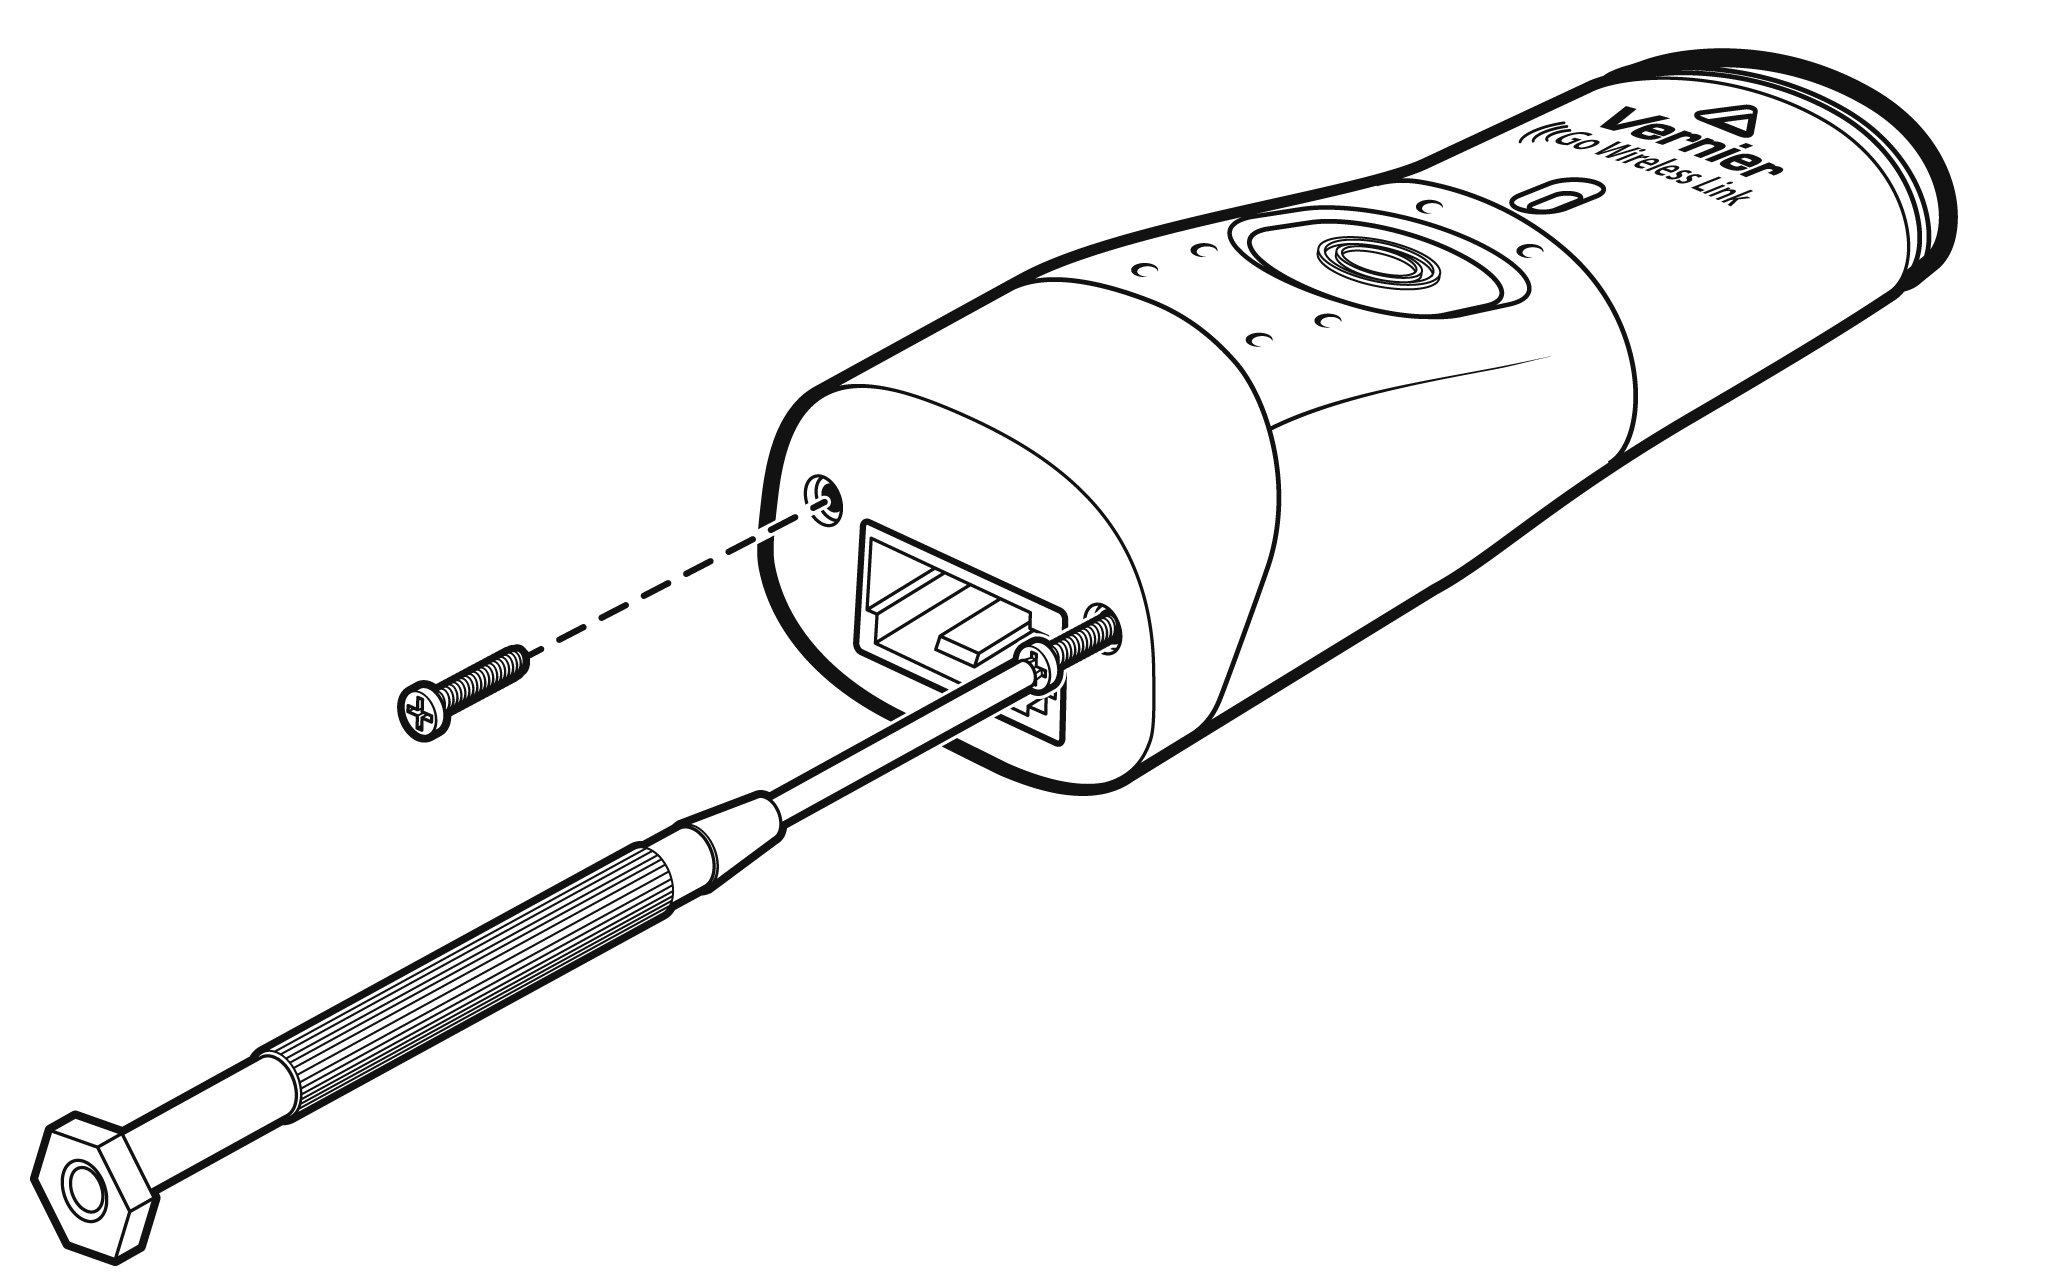
- Carefully place the charging end cap onto the housing. Be sure the charging clips are not bent or broken or permanent damage can result. Secure the two screws.

- Test the new battery by pressing the button once on your Go Wireless Link and verifying the LED lights.
- Attach a probe and continue using your Go Wireless Link.
