This information pertains to the original LabQuest.
If you have LabQuest 2, see this article.

To prepare a USB thumb drive for updating LabQuest, do the following:
1. Start with a clean and validated USB drive. See My USB drive is not recognized by LabQuest. What can I do? If you are trying to recover a non-booting LabQuest, you need to use a drive that is 4 GB or less.
2. Make sure that you are applying an update that works with your LabQuest. Original LabQuest will only support software version numbers starting with a 1 (for example, LabQuest App 1.6). The original LabQuest cannot use update files intended for LabQuest 2 or LabQuest 3 (for example LabQuest App 2.1).
3. If you haven’t already done so, double-click to unzip the .zip update file downloaded from:
https://www.vernier.com/labquest/updates/
4. Copy the contents of the unzipped folder to your USB drive. It is important to copy only the contents of the folder, and not the folder itself. Also, it is important to copy the contents directly to the “root” level of the USB drive, which is the top-most level in the file structure of the USB drive. In other words, do not put the contents into a new folder, or into any existing folder.
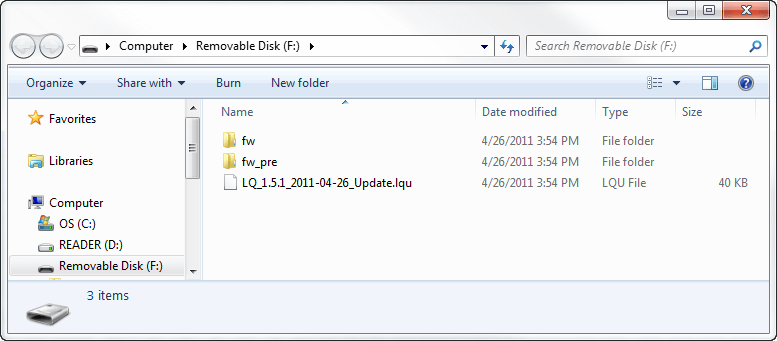
5. You should now see three items on the USB drive:
— an updater file ending in .lqu
— a folder named fw
— a folder named fw_pre
Specifically, if you are using Windows and your USB drive is F:, then the location should be F:fw.

On a Mac, it should be the first thing you see when you click on the drive.

If the items were not copied to the root level, you will see a folder name between the drive name and the item name (e.g., F:LQv1.5.1-Updatefw). If this is the case, remove the items from the folder and put them at the root level of the USB drive.
RELATED:
My original LabQuest is stuck on the LabQuest logo screen.
