This article is for macOS computers with LabQuest 2 or LabQuest 3 only.
LabQuest 2 and LabQuest 3 can be viewed and controlled on a macOS computer using the Screen Sharing app, ![]() , accessed through Finder,
, accessed through Finder, ![]() . For security reasons, Screen Sharing can only connect to password protected servers, so it will be necessary to configure the LabQuest Viewer setting on your LabQuest to require a password.
. For security reasons, Screen Sharing can only connect to password protected servers, so it will be necessary to configure the LabQuest Viewer setting on your LabQuest to require a password.
Setting up LabQuest
- Launch the
 Connections app on your LabQuest
⚬ LabQuest 3: Tap Settings, , then choose Connections.
⚬ LabQuest 2: Tap Wi-Fi,, on the task bar. - Ensure Wi-Fi is On, then connect your LabQuest to the same network your computer is on.
(The LabQuest and the computer must be on the same network for this to work.) - Tap the Viewer settings icon.
⚬ LabQuest 3:
⚬ LabQuest 2: - Ensure the LabQuest Viewer is On. Tap to select Require Password, then set the password.
- Tap Close to save the settings and return to the Connections app.
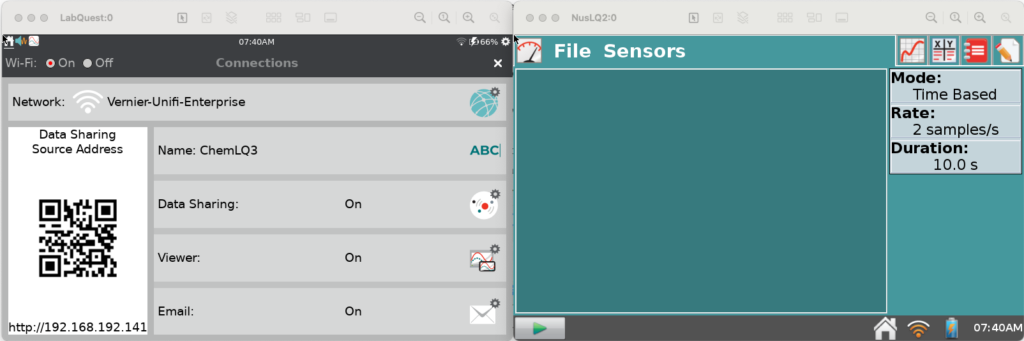
- Note the IP address of your LabQuest (shown in the lower left corner of the Connections app screen). You will need this to connect to your LabQuest.
Connecting to the LabQuest
- Launch Finder,
 , then open the Go menu.
 - Choose Connect to Server (⌘K).
- Type in the IP address of your LabQuest preceded by vnc://
(e.g., vnc://192.168.192.141 as shown below).
- Click or tap Connect, then enter the password you set on your LabQuest.
- Once connected, the live LabQuest screen is shown on your computer, and the Screen Sharing app icon,
 , is shown in the Dock. (Hint: For a fast way to reconnect to your LabQuest, Ctrl+click the icon and select Keep in Dock from the Options menu.)
Note: Multiple LabQuest devices can be opened in different windows using this same procedure.
Using Screen Sharing
- Display the LabQuest screen to your whole class by connecting your computer to a projector or large monitor.
- Click or tap the LabQuest screen on your computer to control the LabQuest just as if you tapped the screen itself.
- Choose Screen Capture from the Screen Sharing Connection menu to capture LabQuest screenshots for use in lab instructions, lab reports, or other documents.
- To quickly reconnect to your LabQuest, launch Screen Sharing (from the dock). Choose Open Recent from the Connection menu and select your LabQuest from the list.