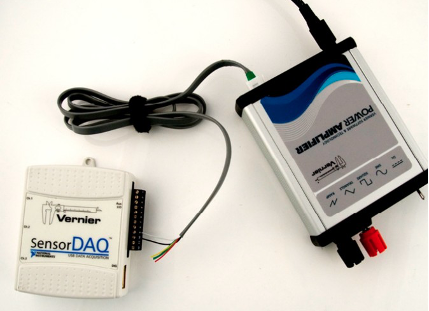
SensorDAQ (
Make the connection via the BTA connector
Use a cable with a BTA connector on one end and bare wire on the other, such as the Analog BTA Cable (
The advantage of this method of connection is better resolution on the analog output, since you are using the full range of the SensorDAQ analog output. A sample VI showing how to control the SensorDAQ analog output is included in the SensorDAQ Examples folder.

Make the connection via the 3.5 mm input using a mono audio connector
The tip of the connector should be wired to the #9 screw terminal (analog out) on the SensorDAQ. The base of the connector should be wired to the #10 screw terminal (ground). Using this connection, the Power Amplifier will increase the voltage by a factor of 10. This means that you should only use SensorDAQ analog output settings up to one volt.
This method allows you to simultaneously use the BTA connector on the Power Amplifier to connect to the SensorDAQ. You can then read the current sensor built into the Power Amplifier with SensorDAQ.
Power Amplifier Troubleshooting and FAQs
SensorDAQ Troubleshooting and FAQ
