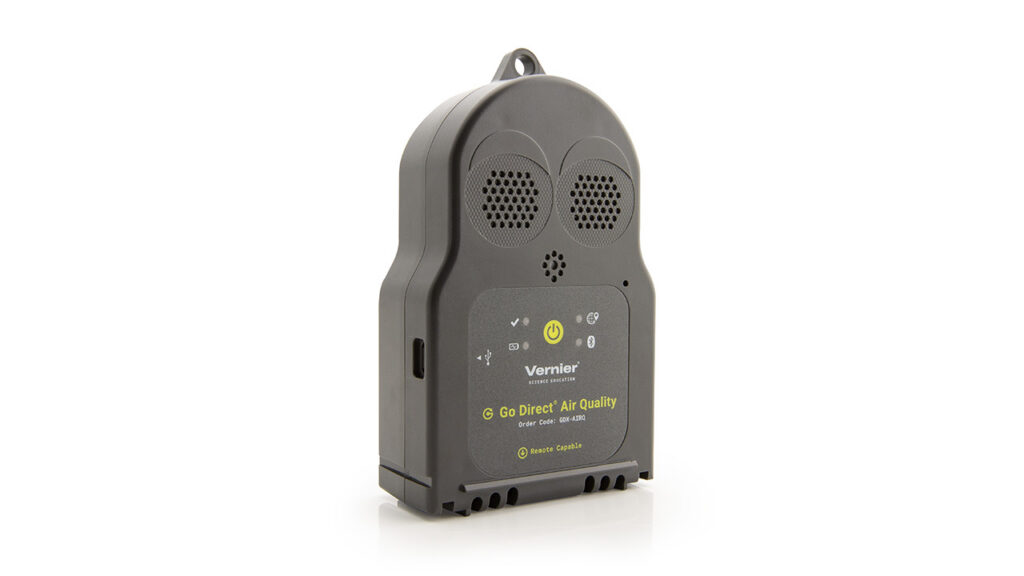
Go Direct® Air Quality Sensor User Manual
Order Code: GDX-AIRQ
Note: Vernier products are designed for educational use. Our products are not designed nor are they recommended for any industrial, medical, or commercial process such as life support, patient diagnosis, control of a manufacturing process, or industrial testing of any kind.
What's Included
- Go Direct Air Quality
- Sensor Bracket for Go Direct
- Vernier Lanyard
- USB-C to USB-A Cable
Compatible Software
Choose a platform below to see its compatibility requirements.LabQuest
Interface LabQuest App LabQuest 3 Full support LabQuest 2 Full support 1 LabQuest Incompatible Compatibility Notes
Computers
Software Interface Graphical Analysis Graphical Analysis (Web App) No interface required Full support Full support LabQuest 3 Full support 1 Incompatible LabQuest 2 Full support 1 2 Incompatible Compatibility Notes
Chromebook
Software Interface Graphical Analysis (Web App) No interface required Full support iOS
Software Interface Graphical Analysis Graphical Analysis GW No interface required Full support Incompatible LabQuest 3 Full support Full support 1 LabQuest 2 Full support 2 Full support 1 2 Compatibility Notes
Android
Software Interface Graphical Analysis Graphical Analysis GW No interface required Full support Incompatible LabQuest 3 Full support Full support 1 LabQuest 2 Full support 2 Full support 1 2 Compatibility Notes
Python
Software Interface Python No interface required Full support Javascript
Software Interface Javascript No interface required Full support LabVIEW
Software Interface NI LabVIEW No interface required Full support
Quick Start: Vernier Graphical Analysis® and Bluetooth®
- Charge your sensor for at least 2 hours before first use.
- Turn on your sensor. The LED will blink red.
- Launch Graphical Analysis, then click Sensor Data Collection.
- Select your sensor from the list. The sensor ID is located on the sensor label near the bar code. Note: If you don’t see a list of available sensors, click WIRELESS. After selecting your sensor, click Pair.
- Click DONE. You are now ready to collect data.
Using other Vernier data-collection apps or want to connect via USB?
Visit www.vernier.com/start-go-direct
Note: This sensor also works with LabQuest 2 and LabQuest 3; it does not work with the original LabQuest.
Charging the Sensor
Connect Go Direct Air Quality to the included USB Charging Cable and any USB device for two hours. We do not recommend charging more than two Go Direct Air Quality sensors with the Go Direct Charge Station.
An LED on each Go Direct Air Quality indicates charging status.
| Charging |
The orange LED next to the battery icon is solid while the sensor is charging. |
| Fully charged |
The green LED next to the battery icon is solid when the sensor is fully charged. |
Powering the Sensor
| Turning on the sensor |
Press the button once. The Red LED indicator next to the Bluetooth icon flashes when the unit is on. |
| Putting the sensor in sleep mode |
Press and hold the button for more than three seconds to put the sensor into sleep mode. The Red LED indicator next to the Bluetooth icon stops flashing when sleeping. |
See the following link for up-to-date connection information:
www.vernier.com/start/gdx-airq
Connecting via Bluetooth
| Ready to connect | The red LED next to the Bluetooth icon flashes when the sensor is awake and ready to connect. |
| Connected | The green LED next to the Bluetooth icon flashes when the sensor is connected via Bluetooth. |
Connecting via USB
| Connected and charging | The orange LED next to the battery icon is solid when the sensor is connected to Graphical Analysis via USB and the unit is charging. The LED next to Bluetooth icon is off. |
| Connected, fully charged | The green LED next to the battery icon is solid when the sensor is connected to Graphical Analysis via USB and fully charged. The LED next to Bluetooth icon is off. |
| Charging via USB, connected via Bluetooth |
The orange LED next to the battery icon is solid when the sensor is charging. The Green LED next to the Bluetooth icon flashes. |
Identifying the Sensor
When two or more sensors are connected, the sensors can be identified by tapping or clicking Identify in Sensor Information.
Using the Product
Connect the sensor following the steps in the Quick Start section of the user manual.
The sensor shows best performance when operated within the recommended normal temperature and humidity range of 10–40°C and 20–80% RH, respectively. Long-term exposure to conditions outside normal range are not recommended.
When moving the sensor from indoor to outdoor use, changes in temperature and environmental conditions will affect the readings. Time is needed to allow the sensor to reach a state of equilibrium with its environment. Depending on how large of a temperature difference this is, this time could take anywhere from 5 to 30 minutes.
The electrochemical (NO2, SO2, O3) and particulate matter sensors need to warm up before data can be collected. The Sensor warm-up LED (✔) indicates when the sensors are ready for data collection.
- The LED is orange while the electrochemical (NO2, SO2, O3) and particulate matter (PM) sensors are warming up and preparing to measure.
- The LED is solid green when the sensors are ready to measure.
- If the indicator LED turns solid red, maintenance of the sensor is required. Contact Vernier Science Education for support.
The built-in GNSS (Global Navigation Satellite System) allows you to "geotag" your data. This means you can export your findings into a GIS (Geographic Information System) program or Google Maps™ to see where your readings were recorded on a digital map. For best results, place the sensor in an area with a clear view of the sky. It can take a few minutes for satellite connectivity to occur. The GNSS Signal LED indicates the connection status:
- The LED is green when the sensor is connected to the GNSS satellite system.
- The LED is red when the GNSS sensor is not getting a signal from the GNSS satellite system or in the process of acquiring a signal.
- The LED is off when the GNSS channels (Latitude, Longitude or Altitude) are not selected.
Channels
Go Direct Air Quality has the following measurement channels:
|
|
Particulate Matter (PM1, PM2.5, PM10)
These channels report particulate matter total density based on the size range of fine particles in µg/m3.
Carbon Dioxide (CO2)
This channel reports the atmospheric concentration of carbon dioxide gas in ppm or mg/m3.
Nitrogen Dioxide (NO2)
This channel reports the atmospheric concentration of nitrogen dioxide gas in ppm, ppb, or mg/m3. The NO2 sensor is an electrochemical sensor with no cross-sensistivity.
Sulfur Dioxide (SO2)
This channel reports the atmospheric concentration of sulfur dioxide gas in ppm, ppb, or mg/m3. The SO2 sensor is an electrochemical sensor that has cross-sensitivity to Hydrogen sulfide.
Ozone (O3)
This channel reports the atmospheric concentration of ozone gas in ppm, ppb, or mg/m3. The O3 sensor is an electrochemical sensor that has cross-sensitivity to NO2. For accurate O3 values, the NO2 channel should always be used at the same time and a calculated column used to correct for the cross-sensitivity. To correct for the cross-sensitivity you would calculate:
actual O3 = reading O3 - 0.84*NO2
Instructions on how to create a calculated column can be found at www.vernier.com/26908
VOC Index (Volatile Organic Compound index)
This channel reports a unitless VOC index value. The VOC index is a relative scale as the sensor “learns” the environment, where 100 is considered the baseline reading for the room. A reading higher than 100 means that there are more VOCs compared to the average while a reading below 100 means that there are fewer VOCs compared to the average.
Temperature
This channel measures ambient temperature in °C or °F. Temperature readings may differ slightly from those of dedicated ambient temperature sensors because the sensor is located inside the device. Internal heat generated by the sensor and exposure to direct sunlight can cause readings to be higher than the actual ambient temperature.
Relative Humidity
This channel measures the relative humidity of the air in percent. Relative humidity is a ratio of the actual amount of water vapor in the air to the potential fully saturated air. It is dependent on temperature and pressure.
Barometric Pressure
This channel reports barometric pressure in hPa, mbar, kPa, mmHg, or inHg. Barometric pressure is the absolute pressure adjusted to mean sea level. To accurately read barometric pressure, you must enter your elevation into the calibration for the channel.
Absolute Pressure
This channel reports the absolute pressure at the current location in hPa, mbar, kPa, mmHg, or inHg. It is the pressure exerted by the atmosphere due to gravity at that given location.
Latitude, Longitude, and Altitude
These channels report the latitude, longitude, and altitude at the current location based on GNSS satellite data.
Videos
Calibrating the Sensor
Carbon Dioxide
For accurate readings, the CO2 sensor needs to be exposed to fresh air at least every 7 days.
Barometric Pressure
To accurately report barometric pressure, this channel needs to know your current elevation. This only needs to be done once if you are not changing elevations. Each time you move to a different elevation, this channel will need to be adjusted with a calibration. To enter your current elevation,
- Launch Graphical Analysis, connect the sensor, and turn on the Barometric Pressure channel, if not already enabled.
- Click the Barometric Pressure meter and choose Calibrate.
- Enter your elevation in meters. Click Keep.
- Click Apply.
Particulate Matter
We recommend running a cleaning cycle if the Go Direct Air Quality Sensor has been stored uncovered or used in very dusty or dirty environments.
- Launch Graphical Analysis and connect the sensor. The PM2.5 channel should already be enabled, if not, turn it on.
- Wait for the Sensor warm-up LED (✔) to turn green.
- Click the PM2.5 meter and choose Calibrate.
- Click Calibrate, the Sensor warm-up LED (✔) will turn orange as the cleaning cycle takes place.
- Click Done.
- When the Sensor warm-up LED (✔) turns green again, the sensor is ready to use.
All other channels on this sensor are factory calibrated and cannot be calibrated by the user.
Specifications
|
Particulate Matter Mass Concentration Specified Range: |
0–1000 µg/m3 |
|
PM1 size range |
0.3–1 µg |
|
PM2.5 size range |
0.3–2.5 µg |
|
PM10 size range |
0.3–10 µg |
|
CO2 Range |
0–5,000 ppm |
|
Resolution |
1 ppm |
|
NO2 Range |
0-2 ppm |
|
Resolution |
0.01 ppm |
|
SO2 Range |
0-2 ppm |
|
Resolution |
0.01 ppm |
|
O3 Range |
0-2 ppm |
|
Resolution |
0.01 ppm |
|
VOC Index |
1–500 |
|
Temperature Range |
10–40℃ (-10℃ min, 50℃ max short term) |
|
Relative Humidity Range |
20–80% (10% min, 90% max short term) |
|
Station Pressure Range |
260–1260 hPa |
|
Maximum sampling rate |
1 sample/s |
|
Battery |
2600 mAh Li-Poly |
|
Bat tery life (single full charge) |
~24 hrs |
|
Battery life (long term) |
~500 full charge cycles (several years depending on usage) |
|
Connection Type |
USB-C |
|
Remote Data Logging |
Yes. Learn more at www.vernier.com/remote-logging |
Care and Maintenance
Proper care and storage are important for optimal longevity of your Air Quality Sensor.
Over time if the sensor has been exposed to a high particulate environments (eg. car exhaust pipe, wood working room, wood burning fireplace), filters on the front plate will get dirty. Using a dust blower bulb or canned air, give the filters a gentle spray to remove any large particles. The front plate can be replaced when the filters have discolored. For more information contact Vernier at 1-888-837-6437 or vernier.com.
It is recommended for long term storage to store the sensor in a sealed bag, such as the bag that is included with the sensor. This will help prevent dust accumulation and exposure to any moisture or other elements.
Extended Storage
To store Go Direct Air Quality for extended periods of time, shut the device completely down by holding the power button down for at least three seconds. The red LED will stop flashing to show that the unit is shut down. Over several months, the battery will lose some charge but will not be damaged. After such storage, charge the device for a few hours, and the unit will be ready to go.
Battery Information
Go Direct Air Quality contains a small lithium-ion battery. The system is designed to consume very little power and not put heavy demands on the battery. Although the battery is warranted for one year, the expected battery life should be several years. Replacement batteries are available from Vernier (order code: GDX-BAT-2600).
Exposing the battery to temperatures over 35°C (95°F) will reduce its lifespan. If possible, store the device in an area that is not exposed to temperature extremes.
When the battery in the Air Quality sensor completely discharges, charge goes to zero, it will enter a state of battery fault. This state is indicated by the battery LED flashing double orange. The battery will not start charging until it is reset. To reset the battery, remove the battery door on the back of the sensor. Using a paper clip, press the battery reset button on the circuit board. Charge the sensor for 24 hours before next use.
Water Resistance
Important: Go Direct Air Quality is water resistant but not waterproof. It should never be immersed in water or exposed to excessive moisture.
If water gets into the device, immediately power the unit down (press and hold the power button for more than three seconds). Disconnect the sensor and charging cable, and remove the battery. Allow the device to dry thoroughly before attempting to use the device again. Do not attempt to dry using an external heat source
Troubleshooting
For troubleshooting and FAQs, see www.vernier.com/til/26638
Repair Information
If you have watched the related product video(s), followed the troubleshooting steps, and are still having trouble with your Go Direct Air Quality, contact Vernier Technical Support at support@vernier.com or call 888-837-6437. Support specialists will work with you to determine if the unit needs to be sent in for repair. At that time, a Return Merchandise Authorization (RMA) number will be issued and instructions will be communicated on how to return the unit for repair.
Accessories/Replacements
| Item | Order Code |
|---|---|
|
GDX-MOUNT |
|
|
V-LAN |
|
|
GDX-BAT-2600 |
|
|
CB-USB-C-A |
Warranty
Warranty information for this product can be found on the Support tab at www.vernier.com/gdx-airq/#support
General warranty information can be found at www.vernier.com/warranty
Disposal
When disposing of this electronic product, do not treat it as household waste. Its disposal is subject to regulations that vary by country and region. This item should be given to an applicable collection point for the recycling of electrical and electronic equipment. By ensuring that this product is disposed of correctly, you help prevent potential negative consequences on human health or on the environment.
The recycling of materials will help to conserve natural resources. For more detailed information about recycling this product, contact your local city office or your disposal service.
Battery recycling information is available at www.call2recycle.org
Do not puncture or expose the battery to excessive heat or flame.
 The symbol, shown here, indicates that this product must not be disposed of in a standard waste container.
Contact Support
Fill out our online support form or call us toll-free at 1-888-837-6437.