Go Direct® Turbidity User Manual
Order Code: GDX-TRB
Go Direct Turbidity is used to determine the turbidity of a freshwater or saltwater samples. Turbidity is a measure of water’s lack of clarity and is an important indicator of water quality. Water with high turbidity is cloudy, while water with low turbidity is clear. The cloudiness is produced by light reflecting off particles in the water; therefore, the more particles in the water, the higher the turbidity.
Note: Vernier products are designed for educational use. Our products are not designed nor are they recommended for any industrial, medical, or commercial process such as life support, patient diagnosis, control of a manufacturing process, or industrial testing of any kind.
What's Included
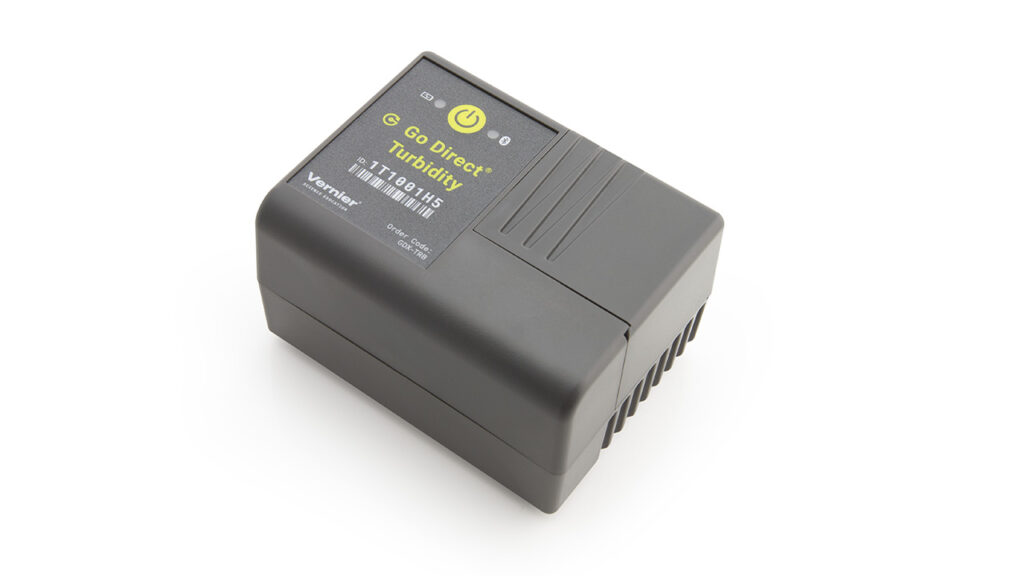
- Go Direct Turbidity Sensor
- Micro USB Cable
- 3.5 mL polystyrene cuvettes (15)
- plastic cuvette lids (15)
Compatible Software
Choose a platform below to see its compatibility requirements.LabQuest
Interface LabQuest App LabQuest 3 Full support LabQuest 2 Full support 1 LabQuest Incompatible Compatibility Notes
Computers
Software Interface Graphical Analysis Graphical Analysis (Web App) No interface required Full support Full support LabQuest 3 Full support 1 Incompatible LabQuest 2 Full support 1 2 Incompatible Compatibility Notes
Chromebook
Software Interface Graphical Analysis (Web App) No interface required Full support iOS
Software Interface Graphical Analysis Graphical Analysis GW No interface required Full support Incompatible LabQuest 3 Full support 1 2 Full support 1 2 LabQuest 2 Full support 1 2 3 Full support 1 2 3 Compatibility Notes
Android
Software Interface Graphical Analysis Graphical Analysis GW No interface required Full support Incompatible LabQuest 3 Full support 1 2 Full support 1 LabQuest 2 Full support 1 2 3 Full support 1 3 Compatibility Notes
Python
Software Interface Python No interface required Full support Javascript
Software Interface Javascript No interface required Full support 1 Compatibility Notes
LabVIEW
Software Interface NI LabVIEW No interface required Full support
Quick Start: Vernier Graphical Analysis® and Bluetooth®
- Charge your sensor for at least 2 hours before first use.
- Turn on your sensor. The LED will blink red.
- Launch Graphical Analysis, then click Sensor Data Collection.
- Select your sensor from the list. The sensor ID is located on the sensor label near the bar code. Note: If you don’t see a list of available sensors, click WIRELESS. After selecting your sensor, click Pair.
- Click DONE. You are now ready to collect data.
Using other Vernier data-collection apps or connecting via USB?
Charging the Sensor
Connect the Go Direct Turbidity Sensor to the included USB Charging Cable and any USB device for two hours.
You can also charge up to eight Go Direct Go Direct Turbidity Sensors using our Go Direct Charge Station, sold separately (order code: GDX-CRG). An LED on each Go Direct Turbidity Sensor indicates charging status.
| Charging |
Orange LED next to the battery icon is solid while the sensor is charging. |
| Fully charged |
Green LED next to the battery icon is solid when the sensor is fully charged. |
Providing Power
| Turning on the sensor |
Press button once. Red LED indicator flashes when unit is on. |
| Putting the sensor in sleep mode |
Press and hold button for more than three seconds to put into sleep mode. Red LED indicator stops flashing when sleeping. |
Connecting the Sensor
See the following link for up-to-date connection information:
Connecting via Bluetooth
| Ready to connect | Red LED next to the Bluetooth icon flashes when sensor is awake and ready to connect. |
| Connected | Green LED next to the Bluetooth icon flashes when sensor is connected via Bluetooth. |
Connecting via USB
| Connected and charging | Orange LED next to the battery icon is solid when the sensor is connected to Graphical Analysis via USB and the unit is charging. LED next to Bluetooth icon is off. |
| Connected, fully charged | Green LED next to the battery icon is solid when the sensor is connected to Graphical Analysis via USB and fully charged. LED next to Bluetooth icon is off. |
| Charging via USB, connected via Bluetooth |
Orange LED next to the battery icon is solid when the sensor is charging. Green LED next to the Bluetooth icon flashes. |
Using the Product
Connect the sensor following the steps in the Quick Start section of this user manual
- Allow the sensor to warm up for at least one minute.
- Slide the lid of the sensor open to reveal the cuvette slot.
- Fill a cuvette with sample water and place a cap on the cuvette.
- Gently invert the sample water to mix any particles that are suspended in the sample or that may have settled to the bottom. Important: Do not shake the sample. Shaking will introduce tiny air bubbles that will affect the reading.
- Wipe the outside of the cuvette with a soft, lint-free cloth or tissue.
- Insert the cuvette into the cuvette slot and slide the lid closed.
- Monitor the turbidity value. Note: Particles in the water will settle over time and show a slow downward drift in turbidity readings. Take your readings soon after placing the cuvette in the senso
Calibration
The sensor is factory calibrated. For most experiments, calibrating the Turbidity Sensor is not required. If desired, the sensor can be calibrated using a known standard.
To calibrate the sensor in Graphical Analysis, complete the following steps.
- Click or tap the sensor meter to view sensor options.
- Select Calibrate and follow the applicable prompts on the Calibrate Sensor screen.
In order to calibrate Go Direct Turbidity, you need a known calibration solution and a blank (distilled water). A calibration solution set is available from Vernier (GDX-TRB-CAL) that includes a 100 NTU and 800 NTU standard.
Once you have calibrated a Go Direct sensor, the calibration is automatically stored to the sensor and will be used each time you connect to your device. You can always choose to restore factory defaults if you feel the custom calibration is invalid.
To restore factory defaults in Graphical Analysis, complete the following steps.
- Click or tap the live readouts meter and choose Calibrate.
- Click or tap Reset Calibration.
- A window will appear warning you that you are about to reset the calibration. Choose Reset Calibration.
For additional calibration information, see www.vernier.com/til/4011
Specifications
|
Range |
0–1000 NTU |
|
LED Wavelength |
850 nm |
|
Resolution |
0.1 NTU |
Care and Maintenance
Battery Information
Go Direct Turbidity Sensor contains a small lithium-ion battery. The system is designed to consume very little power and not put heavy demands on the battery. Although the battery is warranted for one year, the expected battery life should be several years. Replacement batteries are available from Vernier (order code:
GDX-BAT-300).
Storage and Maintenance
To store Go Direct Turbidity Sensor for extended periods of time, put the device in sleep mode by holding the button down for at least three seconds. The red LED will stop flashing to show that the unit is in sleep mode. Over several months, the battery will discharge but will not be damaged. After such storage, charge the device for a few hours, and the unit will be ready to go.
Exposing the battery to temperatures over 35°C (95°F) will reduce its lifespan. If possible, store the device in an area that is not exposed to temperature extremes.
Water Resistance
Go Direct Turbidity Sensor is not water resistant and should never be immersed in water.
If water gets into the device, immediately power the unit down (press and hold the power button for more than three seconds). Disconnect the sensor and charging cable, and remove the battery. Allow the device to dry thoroughly before attempting to use the device again. Do not attempt to dry using an external heat source.
How the Sensor Works
Infrared light is directed at a cuvette containing the sample water. This light is scattered in all directions off the particles in the water. A detector, consisting of a photodiode, is placed at a 90° angle to the light source. The amount of light being scattered directly into the detector is measured in volts and translated into turbidity units. This style of turbidity sensor is called a nephelometer.
Troubleshooting
Here are some tips for best data-collection practices:
- After filling a cuvette with liquid, seal the cuvette with a cap to prevent spills.
- Gently invert the sample before measuring to evenly distribute particles without introducing air bubbles.
- For best results, use one cuvette to make all your measurements for a given experiment.
Repair Information
If you have followed the troubleshooting steps and are still having trouble with your Go Direct Turbidity Sensor, contact Vernier Technical Support at support@vernier.com or call 888-837-6437. Support specialists will work with you to determine if the unit needs to be sent in for repair. At that time, a Return Merchandise Authorization (RMA) number will be issued and instructions will be communicated on how to return the unit for repair.
Accessories/Replacements
| Accessory | Order Code |
|---|---|
|
GDX-CRG |
|
|
CUV-RACK |
|
| Go Direct Turbidity Calibration Standard |
GDX-TRB-CAL |
| Plastic Cuvettes (Visible, 4-Sided Clear) |
CUV-4S |
| Replacement | Order Code |
| Micro USB cable |
CB-USB-MICRO |
|
GDX-BAT-300 |
Warranty
Warranty information for this product can be found on the Support tab at www.vernier.com/gdx-trb/#support
General warranty information can be found at www.vernier.com/warranty
Contact Support
Fill out our online support form or call us toll-free at 1-888-837-6437.