Shop
- Engineering
- Arduino
- Using Vernier Sensors with Arduino Guide
- Projects and Ideas
- Levitating Ping Pong Ball
Levitating Ping Pong Ball
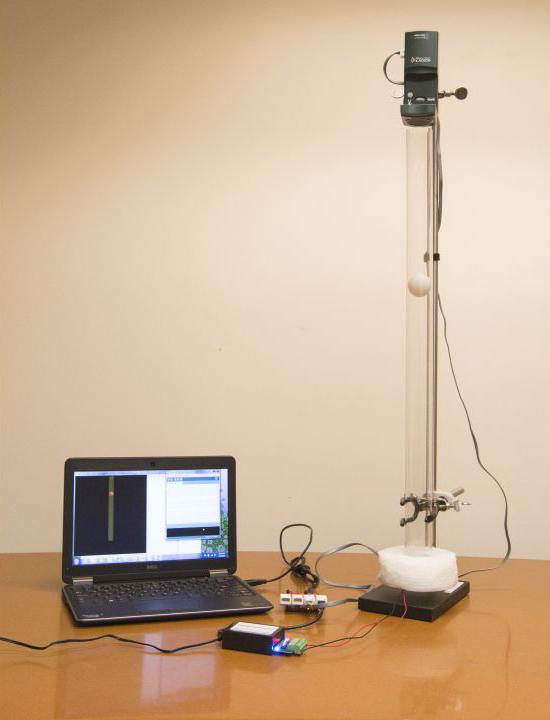
If you are looking for an advanced Arduino challenge, try this levitating ping pong ball project. It involves placing a ping pong ball in a tube with a fan at the bottom of it and placing a Motion Detector at the top of the tube to measure the distance to the ping pong ball. Collected data is evaluated in a PID library and the output is used to control the fan speed. You need to set the constants for proportionality, integral and differential (P, I, and D), or simply use the values that we have used in optimizing the PID feedback loop.
You are able to set the height of the ball by changing the variable “Setpoint” in the program. We have previously created a version of the program that advances through five different heights, pausing for 10 seconds at each one.
There are several opportunities for advanced exploration with this project. You can build your own PID control algorithm rather than importing the PID library. You can also research how to use a PID optimization library that will automatically choose parameter values for you. We have created a VPython program that modeled the ball in the tube based on data from the Motion Detector. For more information on this last element, please refer to Using Arduino™ and VPython to Explore PID Control.

/*
VernierMotionDetectorPID (v 2017.08)
Takes data from a Vernier Motion Detector connected to Digital 1 connector.
Uses PID to control fan to elevate ping pong ball to target height. The ball is in
plastic tube 0.6 m tall with a fan at the bottom and a motion detector at the top.
This version uses a Digital Control Unit (DCU) connected to the Digital 2 port to
control the fan.

Motion detector is read using the Vernier Library that calculates the distance based
the echo of an ultrasonic sound wave.

The PID control is modified from http://playground.arduino.cc/Code/PIDLibaryBasicExample
and takes the calculated input from the motion detector ("distance") and controls analog PWM
output 6 through the DCU (line 1).You will need to download the PID library from
http://playground.arduino.cc/Code/PIDLibrary.

As written, the reading will feed to the PID control continuously and data fed to
Serial Print.

There are several ways you can modify this. We have previously linked the output
of this program to VPython to create a virtual display of the ping pong ball.
Search the internet for tips on combining Arduino and VPython. You can also vary
set point so that it seeks a variety of heights - definitely more eye catching.

See www.vernier.com/arduino for more information.
 */

#include <PID_v1.h>
#include "VernierLib.h"
VernierLib Vernier;
double setPoint, distance, output; //define variables we'll be connecting to
PID myPID(&distance, &output, &setPoint, 3,6.0,6.0, REVERSE);
/*Specify the links and initial tuning parameters. These work for a system
with a 0.6 m tube and the particular fan we are using. Depends on power supply
to the fan as well as cowling around fan.*/

void setup()
{
  Serial.begin(9600);

  setPoint = 40; // setpoint (cm from top)
  myPID.SetMode(AUTOMATIC); //turn the PID on

  Serial.println("Vernier Format 2");
  Serial.println("Motion Detector Readings taken using Ardunio");
  Serial.println("Data Set");

  Serial.print("Set Point");
  Serial.print("\t"); // tab character
  Serial.print ("Distance"); //long name
  Serial.print("\t");
  Serial.println ("Output from PID");

  Serial.print("SP (cm)");
  Serial.print("\t");
  Serial.print("\t");
  Serial.print ("d (cm)"); //short name
  Serial.print("\t");
  Serial.print("\t");
  Serial.println("0 - 255");
  }
void loop()
{
  distance = Vernier.readMotionDetector();
  myPID.Compute();
  analogWrite(6,output);
  Serial.print(setPoint);
  Serial.print("\t");
  Serial.print("\t");
  Serial.print(distance);
  Serial.print("\t");
  Serial.print("\t");
  Serial.println(output);
  delay (10);
}
